Match the crop to a cool season and a firm bed
Cabbage, Brassica oleracea var. capitata, is a leafy brassica grown for its dense head. It belongs to the mustard family alongside kale, broccoli, cauliflower, and Brussels sprouts, which matters when planning rotation.
Rooted gives an indicative 70–120 days to maturity. Use this as a guide from transplanting, not a guarantee from the day seed is sown. Raising a transplant takes additional weeks, and cultivar, temperature, spacing, and season shift the harvest date. Compact pointed heads may be ready before large storage types. Inspect head size and firmness rather than cutting everything on one calendar day.
Choose a sunny, open site with fertile, moisture-retentive but well-drained soil. Cabbage favours cool growth; high heat can check plants and reduce quality. Incorporate well-rotted compost in advance where needed, remove perennial weeds, and let the bed settle. Cabbage transplants establish well in firm ground, so avoid a freshly loosened, fluffy seedbed that leaves roots rocking in loose soil.
Raise and transplant with as little check as possible
-
Sow for the intended harvest season
Follow the packet’s spring, summer, autumn, winter, or overwintering classification rather than treating every cultivar as interchangeable. Sow small batches in clean modules or a protected seedbed, covering seed to the supplier’s recommended depth. Bright light and moderate temperatures produce sturdier plants than a warm, dim windowsill. Thin crowded seedlings before they become leggy.
-
Harden off before planting out
Indoor-raised plants need a gradual introduction to outdoor sun, wind, and cooler nights. Over roughly a week, increase their time outside in a sheltered position, bringing them in if severe weather threatens. A transplant with several true leaves and a well-rooted plug is easier to establish than an old, woody, root-bound plant. Reject any with distorted roots or unexplained wilting.
-
Water, lift carefully, and plant deeply enough
Water modules before moving them and keep the root ball intact. Set plants so the lowest leaves sit just above the soil, without burying the growing point. Draw soil around the roots, firm it gently but thoroughly, and water in. Plant during a cool, still part of the day where possible. If roots remain exposed after settling, add and firm a little more soil.
-
Give the mature head enough space
As a starting range, space compact cultivars about 30 cm apart and larger types 45 cm or more, following the packet. Wider rows make weeding, inspection, and harvest easier. Crowding can delay heading and reduce air movement, while excessive space will not rescue poor soil or erratic watering. For spring greens and later hearts in one row, plant closer and remove alternate young plants for the early harvest.
-
Keep moisture and feeding measured
Water thoroughly during establishment and dry spells, checking moisture below the surface instead of wetting only the leaves. Uneven watering as heads fill can contribute to splitting. Mulch after the soil has warmed, leaving a clear space around stems. Use a soil test for nutrient decisions; excess nitrogen late in growth encourages loose leaves and can delay or weaken the head.
-
Weed shallowly and inspect often
Hand-weed near plants and avoid deep hoeing that cuts roots. Look beneath outer leaves for eggs, caterpillars, aphid colonies, and slime trails. Remove only badly damaged outer leaves, retaining sound wrappers that protect the head. Record which cultivars head well in your conditions.
Put barriers and observation before pest treatment
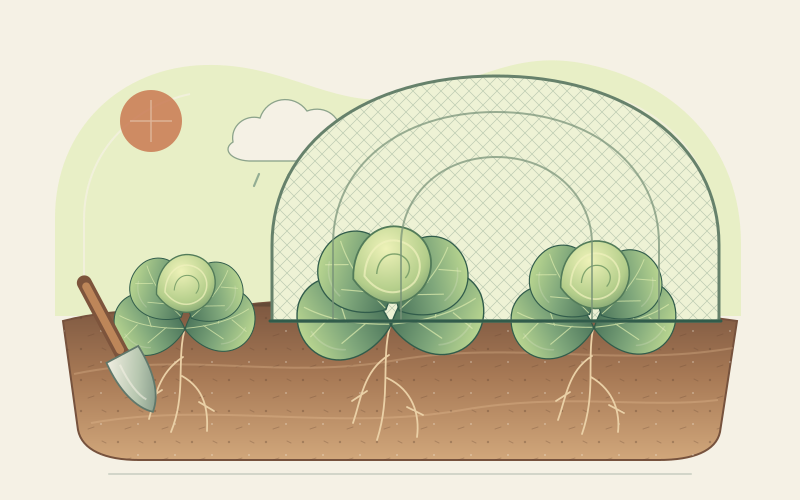
Fine insect-proof mesh works best when installed immediately after planting, before butterflies lay eggs or root flies reach the stems. Support it on hoops clear of foliage, allow for mature spread, and secure every edge against soil. Check that no insects are trapped inside, and close the cover after weeding or inspection. Insect mesh does not necessarily exclude birds.
Caterpillars chew holes and may hide in folded leaves or enter the head. Inspect leaf undersides for egg clusters and small larvae; hand-remove them where practical and safe. Aphids gather on tender growth and undersides, causing curling and sticky residue. Do not reach automatically for a spray: dislodging a small colony with water or removing a heavily infested outer leaf may be enough, while preserving natural enemies. Any product must be legally approved and used exactly as its label directs.
Slugs and snails are especially damaging to young transplants. Protect plants at this vulnerable stage, reduce nearby hiding places, and inspect after dusk or rain. Use barriers, traps, or other controls according to local guidance. A sealed cover cannot remove pests already present in the soil beneath it.
Rotate for clubroot, and lime only when a test supports it
Clubroot is caused by the soil organism Plasmodiophora brassicae. Infected roots become swollen and distorted; above ground, plants may be stunted or wilt in warm weather. Other problems can cause similar top growth, so examine roots and seek local diagnosis rather than assuming. The organism can persist for years and travel in contaminated soil on tools, footwear, water, and infected transplants.
Use clean transplants and avoid moving soil from an affected bed. Where clubroot is confirmed, NC State Extension advises rotating away from all susceptible brassicas, including weedy hosts and volunteers, for a minimum of four to seven years. Rotation lowers risk but does not guarantee eradication. Resistant cultivars, clean raised beds, better drainage, and sanitation may form part of a local management plan; resistance can depend on the pathogen strain present.
Do not add lime by routine or guesswork. Raising pH can reduce clubroot severity in suitably acidic soil, but it does not reliably eliminate an established infestation. Test the soil first, then follow the report’s material and rate. Unneeded liming can raise pH too far, affect nutrient availability, and harm other crops. Never treat a pH target as a substitute for rotation and hygiene.
Cut firm heads and store only sound ones
Press the head gently: it should feel dense and firm for its type, though pointed and savoy heads may be less rock-hard than storage cabbages. Cut through the stem with a clean, sharp knife, retaining a few healthy wrapper leaves. Harvest before mature heads split or deteriorate. If a head cracks, use it promptly if sound rather than assigning it to long storage. After the final harvest, remove stumps and roots to reduce pest and disease carry-over.
For short keeping, refrigerate whole, unwashed heads in a vented bag or container and wash before preparation. Avoid sealing wet heads. For longer storage, choose a cultivar sold for keeping and use mature, unbruised heads with intact wrappers. A cold, humid, frost-free store slows wilting; inspect regularly and remove decaying produce. Utah State Extension reports two to six months at 0°C and about 95% relative humidity for suitable cabbage, not a promise for every type or home refrigerator.
In long storage, keep cabbage away from ethylene-producing apples and pears, which can encourage yellowing and off-flavours. Do not store heads with mould, extensive insect damage, soft rot, or doubtful decay. Refrigerate cooked dishes promptly.