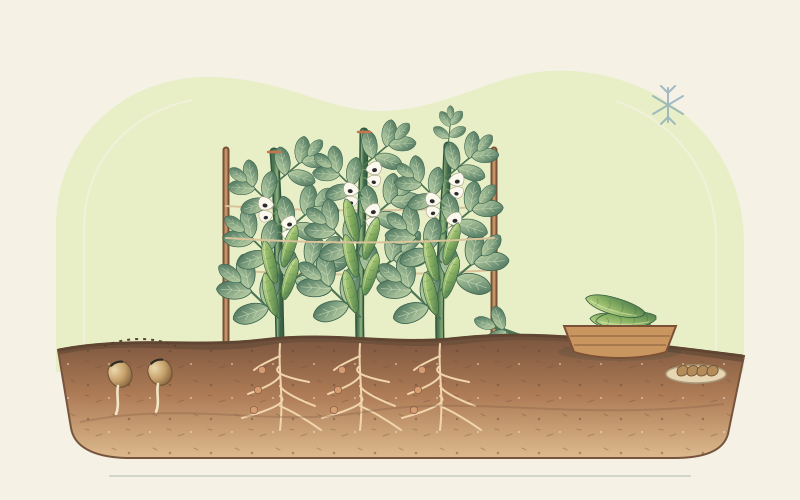
Know the plant and fit the cool season
Broad bean, fava bean or faba bean is Vicia faba, an annual pulse in the legume family. It is not the warm-season common bean, Phaseolus vulgaris. Broad beans have upright, thick and often hollow stems, compound leaves without a climbing tendril, and long pods containing large seeds. The stems can carry considerable pod weight, but they do not twine around a trellis.
The crop grows best in cool conditions and can suffer when flowering meets sustained heat. Depending on the climate, direct sowing may happen in autumn, late winter or spring. Autumn sowing belongs only in suitably mild, well-drained sites with a cultivar explicitly recommended for it. Where winters are severe or soil remains wet, spring sowing is usually the more dependable choice.
Rooted uses 80–180 days from direct sowing to fresh or dry harvest as a general range. Many spring-sown crops produce fresh shelling beans in roughly 80–120 days; a dry-seed harvest commonly takes 120–180 days. Cold highland crops can mature more slowly. Autumn-sown plants also have a longer elapsed calendar because they overwinter, even though much of that time is not active pod production.
Prepare the bed and direct-sow
-
Choose sun, shelter and drainage
Select a sunny bed sheltered from damaging wind. Broad beans need moisture but not saturated roots, so avoid a hollow where water stands. Relieve compaction and improve soil structure before sowing; a raised bed can help where drainage is poor. A soil test is a better basis for liming or fertilising than a routine blanket application.
-
Use sound food-grade or planting seed appropriately
Buy reputable, locally suited planting seed and keep it dry until sowing. Do not sow seed treated with a pesticide unless you can follow every label requirement for that product, crop and site. Our variety guide explains autumn-hardy, longpod, Windsor, dwarf and coloured-seed choices.
-
Sow at a practical depth and spacing
As a general garden starting point, sow about 5 cm deep, with seeds 15–23 cm apart and about 45 cm between single rows. Packet instructions take priority because plant size and growing systems differ. In a double-row system, leave enough access between paired rows for weeding, support and harvest. Sow a few spare seeds in deep pots if mice or uneven emergence are recurring problems.
-
Protect emergence without keeping soil wet
Water gently if the seedbed needs it, then check emergence and protect seed or seedlings from locally troublesome birds, rodents, slugs or snails using lawful, appropriate methods. Do not leave the bed continuously wet in an attempt to speed germination. Where outdoor soil is cold and saturated, starting in deep modules under cool protection can be more reliable; transplant carefully before roots become crowded.
Support first; pinch after the first pods form
Most full-sized broad beans benefit from support around the whole row rather than an individual climbing trellis. Put sturdy stakes at the ends and corners of the row and at intervals along long rows. Run string around the outside, adding levels roughly every 30 cm as the plants gain height. The string contains the stems and reduces lodging; it does not need to hold every stem rigidly. Install stakes early so later work does not damage roots.
Dwarf cultivars may support one another in a block or need only twiggy sticks, especially in an exposed site. Containers still need enough depth, width and stability for the mature plants. A heavy container can become top-heavy in wind, so place it thoughtfully rather than relying on plant size alone.
Pinching is timed by pod set, not merely by calendar or flower colour. Once the lowest flowers have formed small pods, remove the soft growing tip at the top of each main stem. This discourages further soft extension and removes growth frequently colonised by black bean aphids. Pinching too early sacrifices potential lower-node production; leaving it until the end of harvest misses the useful moment. Do not strip leaves or cut back the whole plant.
Water by need and inspect local problems
Keep moisture adequate during establishment and pay particular attention when flowering and pod filling begin. Direct water to the soil and allow excess to drain. Containers dry faster than ground beds. Avoid heavy nitrogen feeding, which can favour soft growth; compatible root-nodule bacteria may supply part of the crop’s nitrogen, but nodulation does not correct waterlogging or other nutrient deficiencies.
Black bean aphid often gathers on soft shoot tips. Inspect the growing points and undersides of leaves, pinch at the appropriate pod-set stage, and conserve natural enemies by avoiding broad-spectrum treatments. Chocolate spot causes dark lesions and can become severe in damp, crowded conditions; broad bean rust produces dusty brown pustules. Pea and bean weevil can notch leaf margins, while established plants often tolerate modest damage.
Symptoms alone do not prove a diagnosis. Space and support plants for airflow, rotate according to local advice, and avoid saving seed from diseased plants. Ask local extension or a plant clinic about severe or unfamiliar damage. Use only legally available pest-control products whose label matches the crop, problem and garden setting.
Choose the harvest endpoint and store accordingly
| Harvest | Ready when | Handle next |
|---|---|---|
| Very young whole pods | Small, tender pods before seeds and pods toughen | Refrigerate, cook whole and use promptly |
| Fresh shelling | Pods are green and well filled; the seed attachment scar is still pale or green | Shell, chill promptly and cook before eating |
| Dry seed | Pods darken and dry; seeds are mature and hard | Shell or thresh, finish drying, inspect and seal |
Lower pods generally mature first. Check every few days and cut or snap pods carefully without uprooting the stem. For tender shelling beans, avoid waiting until the attachment scar turns black and the seed becomes tough. For a storage crop, allow full maturity but do not leave darkening pods in prolonged rain, where seed can mould or sprout.
If wet weather threatens a mature dry crop, lift or cut plants and spread them thinly under ventilated cover rather than heaping them. Shell brittle pods, remove chaff and spread the seed on clean trays until thoroughly hard and dry. Discard mouldy, insect-damaged or doubtful seeds. Store only fully dry seed in clean airtight containers in a cool, dark, dry place; label the cultivar and year and check for condensation or insects.
Fresh pods and shelled beans are perishable. Refrigerate them promptly and cook before eating. For freezing, use a reliable vegetable-freezing method that includes blanching, rapid cooling, drying, suitable packaging and frozen storage; drying seed and freezing fresh seed are different processes. Cooked leftovers also need prompt refrigeration rather than an extended period at room temperature.