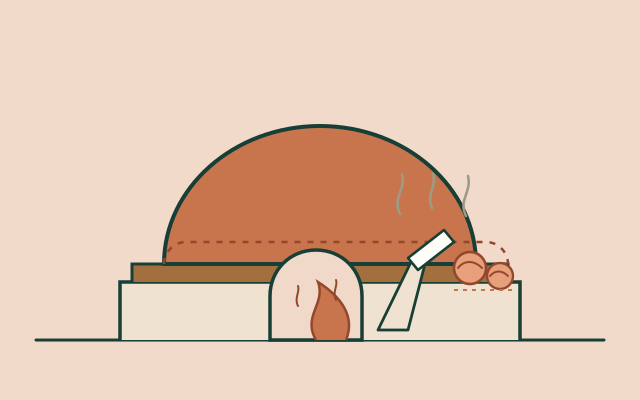
An open fire is romantic and inefficient. Two simple improvements — a thermal-mass oven that stores heat in clay and a rocket stove that burns small wood in an insulated riser — can cut fuel use dramatically and make cooking possible with twigs rather than logs.
Two fires, two jobs
An earth oven is a batch appliance. You fire it for one to two hours, then rake out the embers and use the stored heat to bake bread, roast vegetables, cook beans or dry wood. It is not good for a quick cup of tea; it is excellent for a weekly bake and for a household that plans ahead.
A rocket stove is a continuous appliance. It burns small-diameter wood in a horizontal feed, draws the flame into an insulated vertical riser, and puts a pot directly over the hot gas. It is efficient, hot and quick, but it needs tending and produces high-temperature exhaust. Use it outdoors or under a properly designed flue; never in a sealed room.
Design the cob oven
A good oven has four layers: a base that keeps the fire off the ground; an insulating layer that stops heat escaping downward; a thermal-mass dome that stores heat; and an outer shelter that keeps rain off. The door is small relative to the dome so heat stays in, but large enough to load a loaf or a tray.
A practical size for a household or small group is an internal dome about 60–80 cm across and 35–45 cm high, with a door about 40 cm wide and 25–30 cm high. The floor should be firebrick, stone or a well-fired clay slab. The base can be stone, brick or a plinth of rammed earth; it must be level and strong enough to carry the oven’s weight.
Mix for the thermal mass: 1 part clay : 3 parts sharp sand, plus a generous handful of chopped straw per bucket. The straw burns out, leaving tiny pores that help the dome survive thermal expansion. For the insulating layer, use a much lighter mix: clay slip and straw at roughly 1 : 4–6 by volume, packed around the dome. Do not use the heavy oven mix as insulation — it conducts heat away.
Materials
- Clay-rich subsoil
- Sharp sand
- Straw (chopped for mass, long for insulation)
- Bricks or stone for the base
- Sand for the dome former
- Optional: fired-brick floor, chimney pipe
Tools
- Spade, buckets, mixing tarp
- Wooden float or trowel
- Knife or saw for the door opening
- Bread peel or a flat board
- Gloves and eye protection
For the rocket stove
- Firebricks or dense clay bricks
- Clay-sand mortar
- Grate or perforated plate
- Insulation: ash, perlite or straw-clay
- Pot supports and a flue
Build the oven
-
Build the base
Make a level plinth about 70–90 cm high, so the oven mouth is at a comfortable working height. Use stone, brick or rammed earth, and top it with a flat hearth slab. The base must be solid: a moving oven cracks its dome.
-
Insulate the floor
Lay a 10–15 cm layer of insulating material under the hearth — dry sand, straw-clay, pumice or broken fired brick. Then set the hearth bricks or clay slab on top, tight together and level. This layer stops the base from stealing the oven’s heat.
-
Make the sand former
Pile damp sand into a dome of the intended internal shape. Pack it firm and smooth, then cover it with wet newspaper or cloth so the clay does not stick. The sand is the mould; it will be dug out later.
-
Apply the first layer
Cover the sand with 10–15 cm of the clay-sand-straw mix, working from the base upward. Press it firmly, keep an even thickness, and leave the door area open with a temporary arch or board. This is the structural and thermal layer; do not skimp on compaction.
-
Add the insulation
While the first layer is still damp, pack the light straw-clay insulation around it, 10–20 cm thick. Cover with a final thin clay slip or a shelter roof. The insulation must stay dry; a wet oven is a cold oven.
-
Cut the door and clear the sand
Once the dome is firm enough to hold its shape, cut the door opening to size and scoop out the sand through it. Smooth the inside, check that the dome is sound, and repair any thin spots. A door height of about 60–65% of the dome height is a useful starting rule.
-
Cure slowly
Let the oven dry in shade for several days, then run a series of small fires, increasing gradually over 5–7 days. This drives out remaining water without steam-cracking the dome. A first roaring fire in a wet oven will ruin it.
-
Fire for baking
Burn dry wood in the oven for 1–2 hours until the dome is hot and the soot burns off the interior. Rake the embers into a pit or to one side, close the door, and let the temperature equalise. Bake bread at roughly 220–250 °C, then use the falling heat for tarts, beans or drying. The oven may stay warm for a day.
A chimney is not strictly necessary for a small outdoor oven, but a short flue above the door improves draw, keeps smoke out of your face and lets you cook under a simple roof. If you add one, make it removable for storage and keep it clear of combustible material.
Build a rocket stove
The classic rocket stove is an L-shaped combustion chamber: fuel feeds horizontally, air enters below the fuel, and the flame turns upward into an insulated riser. A pot sits on top, with a gap around its sides (“pot skirt”) so hot gas scrubs the pot before leaving. The insulation keeps the riser hot, which improves combustion and draft.
A simple brick version uses about 40–60 firebricks or dense clay bricks. Build a feed tube about 15 × 15 cm and 30–40 cm long, a combustion elbow, and a riser about 60–90 cm tall and 15–20 cm square. Line the riser with insulation or build it from insulating bricks; a cold riser smokes. Leave a grate or gaps for air, and provide a pot support with a 2–3 cm gap around the pot. Add a flue if you cook under cover.
Light a small fire at the base of the feed, push fuel in as it burns, and keep the feed tube loosely filled. Do not overfill it: the stove needs air. The flame should be bright and the exhaust should be nearly clear once hot. If smoke pours out of the feed, the riser is cold, blocked or too short.
Rocket stoves reach high temperatures and can melt thin metal, crack ordinary brick and scorch nearby surfaces. Build on a non-combustible base, keep clearances, and do not leave it unattended with children or animals nearby.
The cheapest fuel saver: a haybox
For slow-cooked grains, beans and stews, bring the pot to a boil, then place it in an insulated box packed with hay, straw, wool, sawdust or blankets. The food continues cooking in its own heat for hours with no fire. A haybox costs almost nothing, saves fuel and reduces the risk of a fire left burning. Use a pot with a tight lid, preheat the box, and follow safe food-handling rules: keep hot food above 60 °C and do not hold lukewarm food for hours.
Troubleshooting
| Problem | Likely cause | Fix |
|---|---|---|
| Oven smokes out of the door | Cold flue, wet wood, door too large | Warm the flue, use dry wood, reduce the door opening |
| Oven does not hold heat | Thin mass, wet insulation, cold base | Add mass and insulation, dry the oven, insulate under the floor |
| Dome cracks badly | Too much clay, fast firing, no straw | Add sand and straw, cure slowly, patch with the same mix |
| Rocket stove smokes from the feed | Blocked riser, cold riser, fuel too large | Clear the riser, insulate it, split the wood smaller |
| Pot stays cold | Pot too far above the flame, no skirt | Lower the pot, add a skirt, keep the riser hot |
Safety
Carbon monoxide. Never use a rocket stove, oven or charcoal fire in a sealed room. Even a “clean” flame produces CO. Use a flue and a carbon-monoxide alarm where available. Fire. Keep the oven and stove on a non-combustible base, clear of walls, roofs and dry vegetation. Keep a water bucket and sand nearby. Burns. The dome, door, flue and pot supports stay hot for hours; use gloves and long tools. Structure. A heavy oven on a weak plinth can collapse; build the base for the load. Food. Cool leftovers quickly and keep hot food hot; a haybox is not a refrigerator.
Sources and further reading
- Wikipedia: Earth oven — types, construction and retained-heat cooking.
- Wikipedia: Rocket stove — combustion principles and efficiency.
- Wikipedia: Masonry oven — thermal mass and baking.
- Wikipedia: Haybox — retained-heat cooking and fuel saving.