
Crop 054 / Allium schoenoprasum

Keep the clump growing, and share a few flowers.

Grow chives for a perennial supply of slender, mild-onion leaves. Start from seed, a young plant or a division, cut selectively once established, and leave some mauve flower heads for visiting bees as well as the kitchen.

Establish the crop
Seed, plant or division Set small clumps into fertile, drained soil or a suitably sized container.
First light leaf harvest
60–90 days From sowing under favourable conditions; transplants and divisions need establishment first.
Long-term habit
Herbaceous perennial Harvest leaves and newly opened flowers; let some blooms feed pollinating insects.
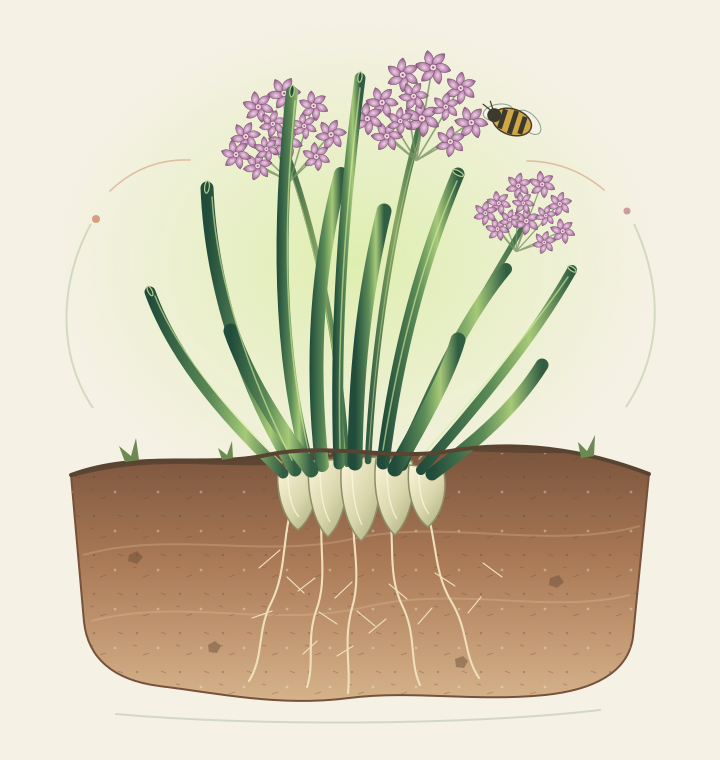
Chive clump with hollow tubular green leaves, three mauve flower globes and slender bulbs with roots in a soil cutaway.
Hollow leaves arise from a dense cluster of small bulbs; rounded flower umbels rise above the edible foliage.

Know the crop

Crop profile

A perennial onion-family herb for repeated light pickings over several years. Good drainage, moderate moisture and periodic division matter more than heavy feeding; flowering supports both edible harvests and insect visitors.

Crop essentials

Botanical name
Allium schoenoprasum
Growth
60–90 days From sowing to a first light leaf harvest under favourable conditions, once leaves are about 15 cm long. Transplants may yield after about 30 days and divisions after several weeks of new growth; let young plants establish before cutting hard. In later years, established perennial clumps can be picked repeatedly during active growth.
Family
Amaryllidaceae (onion family; subfamily Allioideae)
Origin
Temperate Northern Hemisphere, including parts of Europe, Asia and North America
Habit
Hardy, clump-forming herbaceous perennial grown for hollow leaves and edible flowers

Nutrition / raw leaves

Nutrition, in context

Very high Editorial nutrient-density rank 4. This is Rooted’s qualitative category for protein, fibre, folate, iron and potassium, with vitamin highlights adding context. It describes this raw reference, not an official score or the nutrient contribution of a typical garnish.

Reference nutrients per 100 g raw chive leaves, edible portion
Nutrient Amount
Protein3.27 g
Fibre2.5 g
Folate105 µg
Iron1.6 mg
Potassium296 mg
  • Contains vitamin K (212.7 µg), vitamin C (58.1 mg) and vitamin A (218 µg RAE) in the same raw 100 g reference.
  • Provides folate, fibre, potassium and non-heme iron on a raw-weight basis.
  • A tablespoon of chopped raw chives weighs only about 3 g, so a normal garnish supplies much smaller amounts than the 100 g reference.

Basis: Approximate values per 100 g raw chive leaves, edible portion (USDA FoodData Central SR Legacy 169994; legacy NDB 11156). These values are for raw leaves, not cooked chives, dried chives, flowers or garlic chives. Cultivar, leaf age, preparation and serving size change intake. Listed content does not measure absorption or individual dietary needs.

At the table

Use chives to finish a varied meal

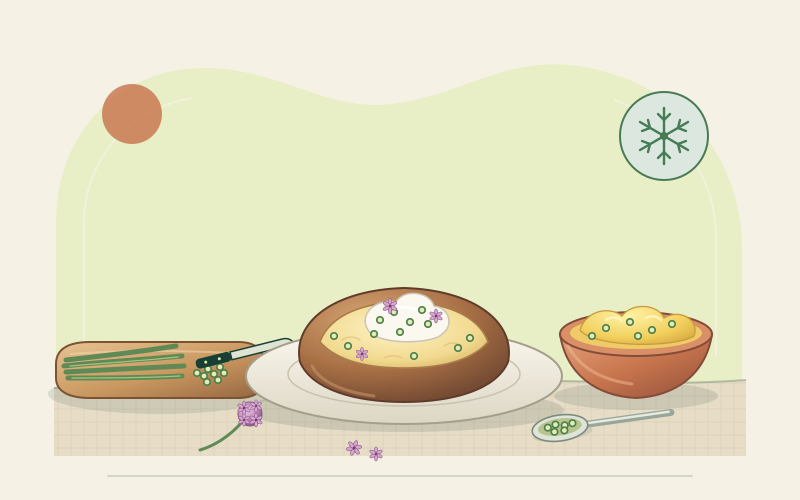
  • Eggs, fish, yogurt or tofu. Protein variety. Chives add a fresh onion note while these foods contribute protein and their own nutrients. Choose according to dietary preference; no single accompaniment is essential. Finish a tofu scramble, omelette, baked fish or plain yogurt dip with freshly chopped chives.
  • Potatoes, grains or whole-grain bread. A varied meal. Starchy foods make a chive-seasoned dish more substantial. Add vegetables and a protein-containing food to build a complete meal rather than relying on a herb garnish for bulk nutrition. Stir chives into crushed potatoes and serve with beans and a leafy salad.
  • Beans, lentils or mixed vegetables. Flavour and dietary variety. Pulses and vegetables add substance, fibre and different nutrients. Chives are best added near serving to preserve their fresh flavour; special nutrient-combining rules are unnecessary. Scatter chives over lentil soup, a white-bean salad or a bowl of cooked mixed vegetables.

The essentials

From a small clump to years of picking

Six practical stages. Adjust timing to local frost, heat and rainfall, and let plant size—not impatience—set the first harvest.

  1. Choose a drained site or container

    Give chives sun or partial shade and fertile, moisture-retentive soil that does not stay waterlogged. Weed the site and incorporate suitable mature organic matter where soil is poor. Use a container at least 20 cm wide and deep with drainage holes and a quality peat-free growing medium.

  2. Sow thinly or plant a young clump

    Sow seed about 0.5–1 cm deep in spring, indoors for an early start or outdoors once soil is workable. Keep the seed zone lightly moist, thin or transplant without crowding, and harden off indoor-grown plants. Set clumps at their previous depth, roughly 15–20 cm apart, then water in.

  3. Divide crowded perennial clumps

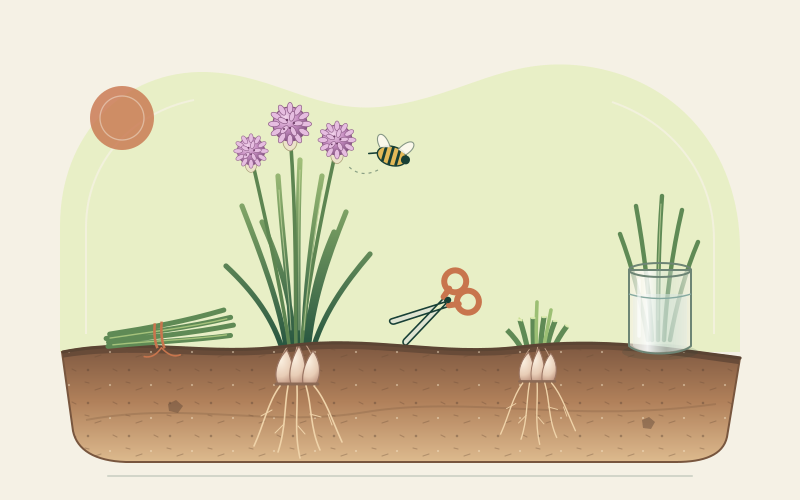
    Every three or four years, or sooner if growth declines, lift a clump in spring or early autumn. Pull or cut it into smaller sections containing several bulbs and intact roots. Replant promptly at the same depth, water well and allow several weeks of fresh growth before resuming a substantial harvest.

  4. Water, weed and leave room for flowers

    Keep new plants and containers evenly moist; established ground plants need water mainly during prolonged dry spells. Hand-weed shallowly around the shallow roots. Watch for aphids, thrips or orange rust pustules and use local diagnosis and controls. Avoid broad claims that chives repel every garden pest.

  5. Cut leaves and pick fresh flowers

    Begin lightly when seed-grown leaves are about 15 cm long, usually 60–90 days after sowing. Snip green leaves about 2.5–5 cm above the soil, taking some rather than stripping every young clump. Pick newly opened flower heads and separate the small florets. Leave other heads open for bees; remove tough spent stalks to limit self-seeding.

  6. Chill promptly and preserve with care

    Use leaves fresh for the best flavour. Refrigerate clean, dry, sound chives at 4°C or below in a loose cover that limits drying without trapping wetness, and use within about a week for quality. Freeze chopped leaves for cooked dishes or dry them completely before airtight storage. Never keep homemade chive-and-oil mixtures at room temperature.

Growing notes by place

Read your region, then read your weather

Compare broad growing conditions, then adjust for your own frost dates, altitude, rainfall and soil.

Cool, temperate and often maritime, with colder springs and more winter dormancy in northern and upland districts.

Northwestern Europe

Chives suit herb beds and containers in Britain, Ireland and nearby districts. Clumps die back where winters are cold and resume as conditions warm.

Indicative planting
Sow indoors in March–April or outdoors in spring once soil is workable; plant out young clumps after hardening off. Divide established clumps in spring or early autumn when soil is moist and workable.
Indicative harvest
Take a light first harvest about 60–90 days after sowing, then pick established leaves from late spring to autumn. Expect mauve flowers mainly in late spring and early summer.
Soil and moisture
Fertile, moisture-retentive but free-draining soil in sun or partial shade; containers need drainage and more frequent watering than ground-grown clumps.

Field note: Leave some flowers open for bees, remove spent stalks to limit self-seeding, and divide crowded clumps every three or four years.
Dates are indicative. Local frost forecasts, heat, seasonal rainfall and recent weather—not the calendar alone—should guide sowing, division and harvest.

Cool-temperate Northern Hemisphere · example

A perennial herb rhythm

A compact planning guide, not a fixed schedule. Shift it with latitude, altitude, winter dormancy and local conditions.

  1. March–April

    Clear old foliage before new shoots develop. Sow indoors or outdoors as soil becomes workable, plant young clumps after hardening off, and divide established plants while conditions are cool and moist.

  2. April–June

    Keep seedbeds, new divisions and containers evenly moist. Weed shallowly and begin a light first harvest when leaves are about 15 cm long. Leave selected flower heads open for visiting bees.

  3. June–August

    Cut green leaves selectively and use newly opened flowers. Remove spent, tough stalks unless saving seed, water during prolonged drought, and cut back an established clump to encourage fresh foliage if needed.

  4. September–November

    Continue moderate harvest while growth lasts. Divide in early autumn where local guidance favours it, refrigerate fresh leaves promptly, and freeze or thoroughly dry surplus before winter dormancy.

The general 60–90-day window runs from sowing to a first light leaf harvest under favourable conditions. Transplants may yield after about 30 days and divisions after several weeks of new growth. Established perennial clumps crop repeatedly in later years.

From the field journal

Grow, choose and use your chives

Practical reading for perennial clumps, true-species variety choices and balanced meals without exaggerated claims.

Your next harvest begins here

Start with one clump and a pair of clean scissors.

A modest planting can supply years of small, useful harvests. Let young plants establish, divide before congestion reduces vigour, and leave a few blooms open for the insects that share the bed.

Open the growing guide