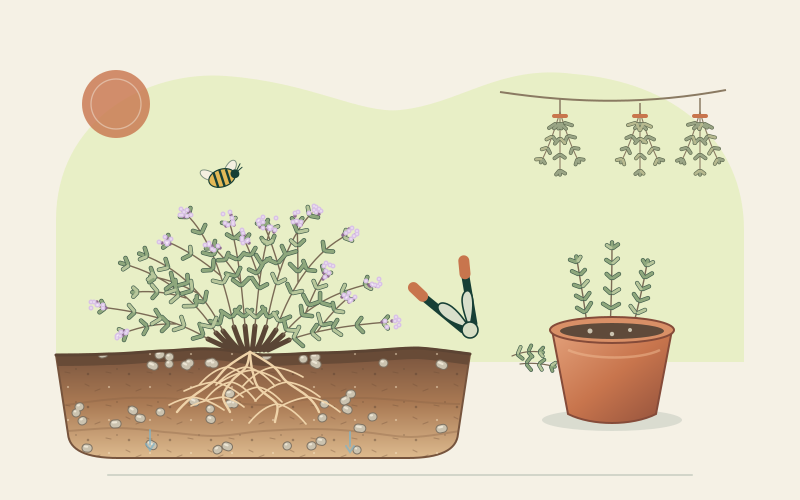
Plan for a small perennial subshrub
Common thyme, Thymus vulgaris, is a low, bushy evergreen perennial in the mint family. Its narrow grey-green leaves grow on fine stems above a woody base. Unlike an annual herb that is sown and removed in one season, a thyme plant can crop for several years, although the centre eventually becomes woody and straggly. A compact shape and a supply of replacement cuttings matter more than trying to keep one old plant forever.
First harvest depends on the starting material. A healthy rooted plant may permit light picking after roughly three months of active establishment. Seed-grown thyme is slower and can take about a year to become established enough to harvest, as RHS guidance notes. These are planning ranges rather than promises. Never strip a young plant: leave enough leafy shoots to photosynthesise and recover.
Full sun and free drainage come first
Choose full sun and moving air. Thyme performs well in light, sandy, rocky or otherwise free-draining soil of modest fertility. Deep shade and rich, heavily fed soil encourage weak growth rather than a better herb. Keep vigorous companions from shading or smothering the low crown, and leave enough space to see whether the base is dry or rotting.
Persistent wet is the central avoidable problem, particularly in winter. On heavy clay or ground that ponds, do not simply mix a little grit into a planting hole and create a sump. Use a broad raised bed, a naturally draining slope or a container. A pot for one plant should be at least about 15 cm (6 in) wide and 10 cm (4 in) deep, with several open drainage holes; RHS suggests up to 25 per cent horticultural grit by volume in a suitable peat-free compost. Never let the pot stand in a full saucer.
Common thyme is associated with Mediterranean climates, but “drought tolerant” does not mean indifferent to frozen, exposed or tropical wet conditions. Check the exact plant’s local hardiness. In rainy cold districts, rain shelter and excellent drainage can be more useful than a heavy insulating mulch over the crown.
Choose the propagation route deliberately
A nursery plant, cutting or rooted layer gives a known aroma, habit and cultivar. Named cultivars do not necessarily come true from their own seed. Buy healthy stock and smell the foliage when culinary character matters. Plant after hardening off, at the same depth as it grew in its pot, in locally mild and workable conditions. RHS suggests spacing plants roughly 20–30 cm (8–12 in) apart according to variety.
Seed is economical for a larger edging but slow. Sow indoors in spring, scattering the tiny seeds thinly on the surface of moist seed compost without covering them. A temperature around 15–20°C (59–68°F) supports germination. Water without saturating the tray, provide bright light and move seedlings with several leaves into individual pots once they can be handled. Damping-off is more likely in wet, stagnant conditions.
For an established plant, take softwood cuttings in spring or early summer and semi-ripe cuttings in summer, or peg a low stem into soil to layer it. Division suits some mat-forming thymes better than an old upright common thyme with a hard centre. Use clean tools and a suitably drained propagation medium, and keep new propagules moist enough to root without being waterlogged.
Water according to establishment and weather
New thyme needs a functioning root system before it can tolerate dry conditions. Water thoroughly when the root zone begins to dry, then check below the surface before watering again. Planting time, rainfall, heat, wind and soil texture determine the interval. Established garden plants often need little extra water in a suitable climate, but prolonged drought can still stress them; containers, small pots and sandy soils dry fastest.
Avoid routine daily sprinkling, water left on foliage overnight and a constantly damp crown. A layer of gravel or grit around the plant can suppress weeds and lift low branches off wet soil. Keep it from burying the stem, and avoid piling wet organic mulch against the crown. Fertiliser is rarely the solution to poor growth: first check light, drainage, crowding and root health.
Trim green shoots, not bare old wood
Light pruning and ordinary harvesting keep common thyme compact. Trim in mid- to late spring and/or soon after flowering, following the shape of the plant and retaining leafy growth. Cutting hard into old, leafless wood is risky because it may not reshoot. Avoid a severe late-season cut that leaves a plant soft or bare entering cold weather.
Do not remove every flower by default. Thyme’s small white, pink or lilac summer flowers provide nectar for bees, butterflies and other pollinating insects. You can cut some leafy stems just before flowers open for the kitchen while leaving a generous portion of the plant to bloom. Observe visiting insects, avoid unnecessary pesticide use and follow the full label for any legally available product; edible-crop and pollinator precautions matter.
After several years, a shrubby thyme may become leggy even with correct pruning. Rather than repeatedly mutilating the old centre, root cuttings or layers and replant vigorous young material. This is routine perennial renewal, not a sign that the original plant failed.
Harvest lightly, then dry completely
Pick young shoots once the plant is established, ideally after dew has dried on a dry morning. Spring and summer growth usually has the best flavour, though an evergreen plant can provide modest year-round pickings in a suitable climate. Use clean scissors or secateurs, leave substantial foliage and avoid pulling at the woody crown. Tough woody stems can flavour a soup or stew in a removable bundle, but should not be served as a surprising woody mouthful.
For storage, discard bruised, soiled, diseased or mouldy material. Rinse sound sprigs under cool running water and gently shake off excess moisture. Do not use soap or detergent on herbs. The National Center for Home Food Preservation recommends a dehydrator preheated to 35–46°C (95–115°F), with up to 52°C (125°F) possible in humid areas; follow the appliance instructions and arrange herbs in a single layer. Drying can take one to four hours, but condition, not a timer, determines completion.
Sturdy herbs such as thyme can also be tied in small bundles and hung in a warm, dark, well-ventilated place. Large wet bundles can mould. Leaves are ready when they crumble and stems break when bent. Strip them from the stems, pack into clean airtight containers, label and store cool, dry and dark. Inspect before use and discard anything mouldy, damp or otherwise spoiled. Dried herbs are commonly three to four times stronger than fresh, so begin with one-quarter to one-third of a recipe’s fresh amount and adjust to taste.