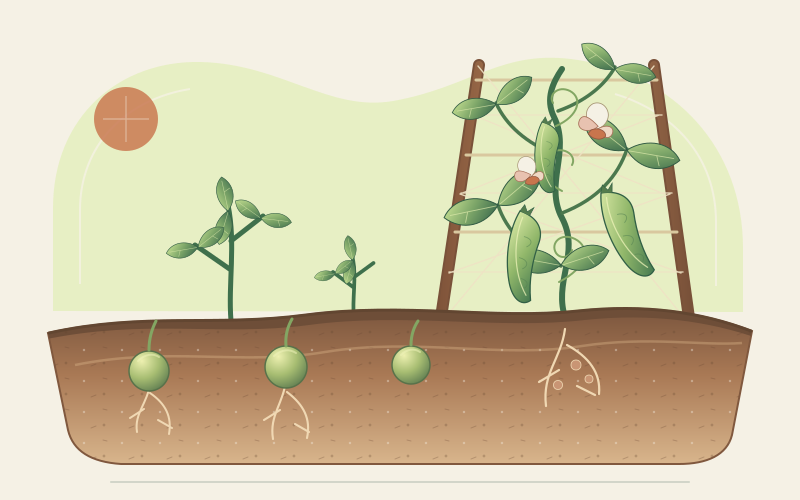
Start with the right pea and season
This guide concerns the garden pea, Pisum sativum, including shelling, snow or mangetout, snap, and dry-pea cultivars. Garden peas are not cowpeas. Black-eyed peas and other cowpeas belong to Vigna unguiculata, generally prefer warmer conditions, and need their own regional growing advice. A shared word in the crop name does not make their seasons interchangeable.
Garden peas grow best in cool, mild conditions rather than prolonged heat. In temperate gardens, direct sow in early spring as soon as the soil is workable and local guidance allows; in mild-winter climates, an autumn or winter window may be more suitable. Successive small sowings can spread fresh harvests, but late sowings must still finish before stressful heat. Rooted’s 55–80 day window is an indicative time from sowing to a first fresh harvest, not a guarantee. Dry peas need longer to mature, and cold soil or hot, dry weather can delay or shorten production.
Direct sow and support the crop
-
Choose sun and free drainage
Select a sunny, reasonably sheltered bed that does not stay waterlogged. Remove weeds and loosen serious compaction without cultivating wet soil. Mature compost can improve structure; use a soil test to guide pH and nutrient corrections. Peas usually need less added nitrogen than many vegetable crops, and excessive nitrogen can encourage leaves rather than pods. Rotation away from recent pea crops may reduce some soil- and residue-borne problems, but cannot prevent airborne disease.
-
Sow into moisture, not mud
Peas have large seeds and transplant less readily than some vegetables, so direct sowing is usually simplest. Follow the packet first; a common starting depth is about 3–5 cm, with seeds spaced roughly 5–8 cm apart in single, double, or wide rows. Leave enough room between rows for supports, picking, and air movement. Water gently after sowing and keep the seedbed moist but not saturated. Very cold, wet soil can rot seed even though the established crop likes cool weather.
-
Put supports in before roots fill the bed
Install twiggy pea sticks, netting, wire, or a trellis at sowing or soon after emergence. Match its height to the named cultivar and anchor it against wind. Climbing types use coiling tendrils to grip a support; guide a stray shoot back rather than tying every stem. Dwarf cultivars need less framework but often still benefit from short branching sticks that hold pods above wet soil. Do not assume that “dwarf” means support-free or that “snap” describes plant height.
-
Treat inoculation as situational
Peas can form root nodules with compatible rhizobia and thereby obtain some nitrogen from the air. They can grow and crop without a purchased inoculant, especially where suitable bacteria are already present. A fresh, pea-compatible inoculant may be useful on ground where peas have not grown before or where nodulation has been poor; it is not a general yield guarantee. Follow the product’s storage and use directions, apply it at sowing, and do not substitute an inoculant made for an unrelated legume.
-
Water at the roots when it matters
Check moisture below the surface instead of following a rigid schedule. Water deeply during dry spells, especially as flowering and pod filling begin, and avoid both drought and waterlogging. Containers dry faster and need frequent checks. Direct water to the soil, then mulch around established plants to limit evaporation and weeds without piling material against stems. Good moisture supports pod development, but no watering routine can make a heat-stressed pea crop behave as though it were cool.
Prevent bird, slug, and mildew damage
Birds can pull seedlings or strip tender growth. Where they are a recurring problem, cover the row promptly with a well-supported, taut net or mesh cage, secure the edges, and choose a mesh that will not trap wildlife. Check covers regularly. Slugs and snails are most damaging to soft seedlings in damp conditions: clear hiding places close to the bed, inspect after rain or in the evening, hand-remove where practical, and protect a small sowing with an appropriate barrier. Avoid routine baiting without an identified problem, and follow local label directions for any control product.
Powdery mildew appears as a white, powdery coating and is often more troublesome as plants age or become dry at the roots. Choose a resistant cultivar where available, give rows adequate space, water at soil level, and maintain steady root moisture. These measures reduce risk rather than guarantee freedom from disease. Avoid handling wet plants, inspect leaves and pods often, and seek local extension identification for spreading spots, distortion, or collapse. Remove badly affected residue where local guidance recommends it; not every home compost heap reaches conditions that destroy pathogens.
Harvest by pod type, then cool or dry
| Harvest | Ready when | What you eat |
|---|---|---|
| Snow / mangetout | Pod is flat to just filling and still tender | Whole young pod |
| Snap | Pod is plump and crisp, with developed peas | Whole fleshy pod and seeds |
| Shelling | Pod is well filled; peas are full-sized but tender | Shelled fresh peas, not the fibrous pod |
| Dry | Seeds are mature and pods are dry and brittle | Fully dried shelled seed |
Use two hands when picking—one to hold the vine and one to remove the pod—so the plant is not uprooted. Pick snow and snap types frequently while tender, and shelling peas before seeds become starchy. Regular picking encourages further pods in suitable cultivars. For dry peas, leave pods on the plant until mature; if wet weather threatens, bring dry pods under ventilated cover rather than leaving them to mould.
Refrigerate fresh pods or shelled peas promptly in a clean container and use them soon. Blanch and freeze surplus fresh peas using a reliable preservation guide; refrigeration alone does not make them long-term storage food. For dry storage, shell brittle pods, discard mouldy or doubtful seed, and continue drying in a thin, ventilated layer until seeds are hard and fully dry. Seal in clean airtight containers in a cool, dark, dry place, label the year, and inspect for moisture or insects. Dried peas still require thorough cooking before eating.