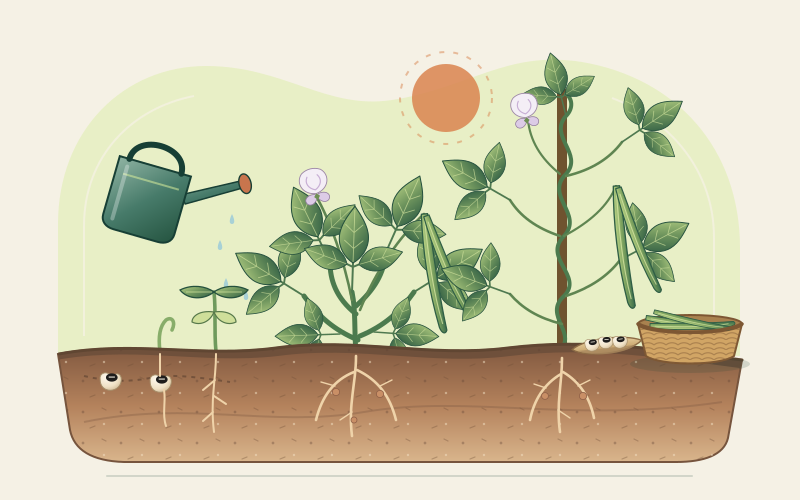
Know the plant and fit the warm season
Cowpea, black-eyed pea, southern pea and crowder pea refer to forms of Vigna unguiculata, an annual legume distinct from common bean and garden pea. Each leaf normally has three broad leaflets. Plants may be compact bushes, spreading semi-vines or vigorous climbers, and their elongated pods can be harvested immature, at the fresh-shelling stage or fully mature and dry. Our cowpea types guide explains why the packet’s habit and intended use matter.
Cowpeas need frost-free conditions and warm soil for rapid, even emergence. Direct sow after local frost, when soil is around 18°C or warmer and moist without being saturated. Cold, wet seedbeds can rot seed or produce a weak stand. In a short season, choose an early cultivar and consider whether a fresh harvest is more realistic than mature dry seed.
Rooted uses 60–100 days from direct sowing to first useful harvest as a general frame. Fresh shelled seed often begins around 60–75 days; dry seed commonly needs 75–100 days. These are not guarantees: day length, cultivar, temperature, moisture and elevation can accelerate or delay flowering and maturity, and long-season types may take longer.
Direct sow, support the actual habit and water by need
Start with sun and drainage
Choose full sun and soil that sheds excess water. Cowpeas can grow in moderately fertile soil, but compacted or waterlogged ground damages roots and establishment. Relieve compaction and improve drainage before sowing; use a raised bed where intense rain ponds. A soil test is a better guide to amendment than routinely adding fertiliser or fresh manure.
Sow seed where it will grow
Cowpeas are normally direct sown. A general garden starting point is 2.5–4 cm deep and 7–10 cm apart, with enough room between rows to weed, support and harvest the selected habit. Large climbers need wider final spacing than compact bushes. Follow the packet and local recommendations first, firm the seedbed for soil contact and water gently if rain has not moistened the seed zone.
Thin, weed and install only necessary support
Check emergence and thin severe overcrowding before plants tangle. Remove weeds while small and avoid deep cultivation around roots. Bush cultivars stand without a routine trellis. For climbing and yardlong types, install strong stakes, netting or a trellis at sowing or soon after, then guide young vines onto it. Secure the structure against summer storms and allow access on both sides for picking long pods.
Keep nitrogen modest
Excess nitrogen can encourage leafy growth at the expense of a timely pod crop. Where compatible root-nodule bacteria are active, they can provide part of the plant’s nitrogen; this does not make the crop independent of other nutrients or water. If local guidance recommends inoculant on ground new to cowpeas, use a fresh product labelled for cowpea and follow its storage and application directions.
Water the root zone at critical stages
Check moisture below the surface rather than following a rigid calendar. Supply water for establishment and again when needed through flowering and pod filling, directing it to the soil and allowing excess to drain. Mulch can buffer evaporation around established plants, but keep it from burying stems. As dry pods approach maturity, avoid unnecessary late irrigation that sustains fresh growth or delays drying.
Heat adaptation is useful, not invulnerability
Cowpeas often tolerate hot conditions and intermittent dry periods better than many other legumes once their roots are established. That adaptation is one reason they are valuable in warm climates. It does not mean every cultivar sets pods in extreme heat, that seedlings survive a dry seedbed, or that filling seeds can develop without water. Severe stress can delay growth, reduce flowering, cause flower or young-pod loss and shrink the harvest.
Similarly, drought adaptation does not make waterlogging safe. The practical response is a locally suited sowing window, dependable moisture at critical stages, good drainage and cultivar selection based on local trials. Record flowering and pod set during heat rather than judging success by lush foliage alone.
Use sound seed and inspect leaves, stems and pods regularly. Local pests, pod-sucking insects, wilts, root rots and fungal or viral diseases vary by place, and symptoms alone rarely identify the cause. Rotate and manage residue according to local advice, avoid handling wet plants unnecessarily and do not save seed from diseased plants. Seek identification from extension or a plant clinic before treatment; any product must be legal and labelled for the crop, problem and setting.
Read three different harvest stages
| Harvest | Ready when | Handle next |
|---|---|---|
| Tender whole pod | Young pods are flexible and seeds are still small; use a cultivar intended for pod harvest | Pick regularly, refrigerate and cook promptly |
| Fresh shelling | Seeds fill the pod and remain soft, plump and green or at the cultivar’s fresh colour | Shell, chill and cook soon, or freeze using a reliable method |
| Mature dry seed | Pods are dry and straw-coloured to brown; seeds are mature and hard | Gather before wet damage, shell, finish drying, inspect and seal |
For fresh shelling, press a sample pod: the individual seeds should be clearly filled but not dry and stony. Pick in rounds because pods on one plant can mature unevenly. For a dry crop, wait for full maturity but do not leave brittle pods in prolonged rain, where staining, sprouting and mould can follow. Climbing crops may keep producing while earlier pods dry; gather ripe pods selectively.
If wet weather threatens mature pods, move cut plants or picked pods under ventilated cover and spread them thinly. Once brittle, shell by hand or thresh gently in a clean sack, then winnow away chaff. Spread seed on clean trays until thoroughly dry, with no cool damp feel; substantial stores need locally recommended moisture testing rather than guesswork. Discard mouldy, insect-damaged or doubtful seed.
Store thoroughly dry seed in clean, food-safe airtight containers in a cool, dark, dry place. Label the type and year and inspect for condensation, insects or odour. Fresh pods and shelled seed are perishable vegetables: refrigerate promptly and use clean handling. Drying, shelling and soaking are not cooking; all forms need appropriate cooking, as described in the kitchen guide.