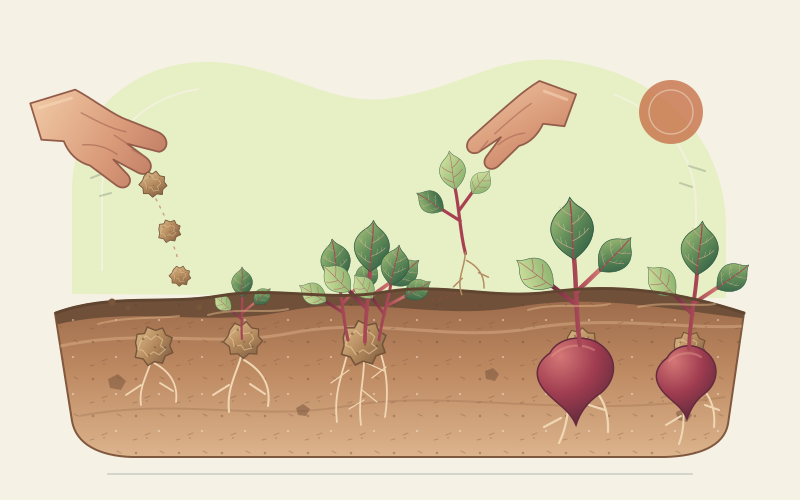
Know the crop and the harvest you want
Garden beetroot, Beta vulgaris, is a biennial usually grown as an annual for its swollen root and edible leaves. It belongs to the amaranth family and is related to spinach and Swiss chard. “Beet” and “beetroot” often refer to the same garden crop; this guide does not cover commercial sugar beet or fodder beet production.
A packet may give 50–75 days to maturity. Treat that as an indicative window for a first usable root, not a deadline. Young leaves can be picked sooner, baby beets may be lifted below full size, and roots intended for storage may stay in the ground longer. Variety, sowing date, temperature, spacing, and moisture all change the timing. Inspect a sample root rather than counting days alone.
Beetroot grows best in cool, moderate conditions with sun and fertile, well-drained soil. Light shade can be acceptable, especially in warm climates, but deep shade limits growth. Remove stones and perennial weeds, and loosen compaction without pulverising the soil. Use a soil test to guide pH and nutrient additions; very rich, fresh manure and excess nitrogen can encourage leaves at the expense of roots.
Direct sowing and care, step by step
-
Choose a suitable sowing window
Sow when the soil is workable and local conditions suit a cool-season crop: spring in many regions, with later sowings for autumn where the season allows. Very cold, wet soil slows or prevents establishment. High summer heat can also reduce germination and root quality. Make small successive sowings rather than one large bed if you want a steady fresh harvest.
-
Sow into a fine, moist seedbed
Direct sowing avoids root disturbance. As a general starting point, make drills about 1–2.5 cm deep and leave roughly 30 cm between rows, following the packet where it differs. Water dry drills before covering the seed so the surface is not washed into a crust. Seed can be sown about 2–5 cm apart initially, then thinned to the final spacing.
-
Read “seed” as cluster or single-germ fruit
A traditional beet multigerm seed is actually a corky fruit cluster containing several embryos. Several seedlings may therefore emerge from one apparent seed. Monogerm seed contains one embryo per fruit, making precision spacing easier. Monogerm does not mean guaranteed germination, and closely sown single seedlings can still need thinning.
-
Thin before crowded plants compete
Once seedlings are large enough to handle, reduce each multigerm cluster to the strongest plant, then adjust the row. Snipping unwanted shoots at soil level avoids disturbing the roots that remain. A common final spacing is about 7–10 cm for typical round roots; allow more for large or long cultivars, and follow the supplier’s directions. Sound young thinnings can be eaten as salad leaves.
-
Keep moisture steady, not excessive
Check moisture below the surface and water thoroughly when needed, especially during establishment and root swelling. Repeated drying can make roots tough or woody, while drought followed by heavy watering can contribute to splitting. Avoid waterlogging. A light mulch applied after the soil warms can slow evaporation and suppress weeds, but keep it clear of crowded stems.
-
Weed gently and watch the leaves
Young beets compete poorly with weeds. Hand-weed near the row and cultivate only shallowly, because roots and the developing crown sit close to tools. Inspect leaf undersides and new growth regularly. Good spacing, clean tools, and removing severely affected material when local guidance recommends it can limit some problems without resorting to improvised treatments.
-
Plan around cold and heat
Beetroot can tolerate light frost once established, but a hard freeze damages tops and exposed roots. Protect late crops where worthwhile. Prolonged cold followed by longer, warmer days can trigger this biennial to flower, or bolt, before making a good root; hot, dry conditions can have the same result. For early sowings, choose a locally recommended bolt-resistant cultivar rather than relying on fleece to remove every risk.
Harvest leaves, baby beets, and keeping roots differently
| Harvest | What to look for | Handling |
|---|---|---|
| Leaves | Young, sound foliage of useful size | Take a few outer leaves; leave enough for root growth |
| Baby roots | Small, firm roots at the size you prefer | Lift alternate plants and use while tender |
| Fresh full-size roots | Firm roots, commonly around 4–7 cm across | Loosen soil and pull without cutting or bruising |
| Storage roots | Mature, sound roots from a suitable late sowing | Lift before damaging frost; trim and store promptly |
For repeated leaf picking, take only a few outer leaves from each plant and retain a healthy centre. Heavy defoliation slows root growth. For roots, loosen the soil beside the plant with a fork and lift gently. Shoulders visible above ground are not necessarily a problem, but check that they have not been damaged by sun, pests, or frost. Very large roots can become fibrous, especially after stress.
For short-term storage, separate tops from roots so the leaves do not continue drawing moisture from them. Leave a short stem stump rather than cutting into the crown. Refrigerate sound, unwashed roots in a vented bag or container, and use the greens soon after washing and chilling them. Brush off loose soil; avoid long soaking. Discard mouldy, badly damaged, or doubtful produce.
For longer storage, use only mature, unblemished roots. A cool, humid, frost-free store limits shrivelling; clean, slightly damp sand or another locally recommended packing material can prevent roots drying against one another. Do not seal wet roots in an airtight container, and inspect the stock regularly. In mild climates, some late roots can remain in the ground with protection, but waterlogging, rodents, and hard frost may make lifting safer.
Read common leaf and root warning signs
Blistered or translucent leaf trails often indicate leaf-miner larvae feeding inside the leaf. Check before damage spreads, remove and dispose of badly mined leaves where appropriate, and use locally recommended barriers for susceptible plantings. Small circular spots with pale centres and darker margins can be Cercospora leaf spot; damp weather and crowded foliage favour some leaf diseases. Rotate away from related crops, clear infected residue as advised, and seek a local diagnosis when unsure.
Split roots often follow irregular water supply. Woody, small, or misshapen roots can reflect heat, drought, overcrowding, old harvest age, or compacted soil. Blackened internal patches may indicate boron deficiency in some soils, but similar symptoms have other causes. Do not apply boron by guesswork: too much can damage crops. Confirm the problem with a soil test and local extension advice.
A tall flower stem signals bolting; roots on badly bolted plants are usually better used promptly if still sound than left for storage. Slugs, birds, rodents, and other animals can also damage foliage or crowns. Identify the culprit before acting, favour barriers, sanitation, and habitat management, and never improvise pesticide doses. Where a legally available product is justified, its label and local guidance govern the crop, target, and method.