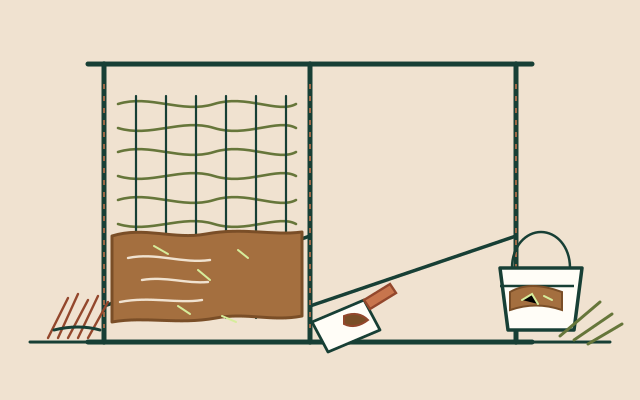
Wattle and daub is a composite wall: a flexible woven lattice carries a thick clay mixture that shrinks onto it and hardens as it dries. The lattice is not the structure. The timber frame is. The daub is not a thin coat of render. It is the infill, pressed into the weave from both sides until the panel becomes a solid, breathable wall.
What this wall is
Wattle is a woven lattice of thin, flexible sticks — hazel, willow, alder or ash — fixed between the members of a timber frame. Daub is a stiff mixture of clay-rich subsoil, sand, water and chopped straw, pushed into the wattle so that it keys around the sticks. A final plaster coat gives a smooth, weather-resistant surface.
It is one of the oldest composite walls in the world, and it is still a sensible way to build a small, dry, well-roofed structure where timber and clay are plentiful. It is not the same as cob (a mass wall stacked without a frame), adobe (moulded bricks) or lath and plaster (thin split laths carrying a lime plaster). Wattle and daub is a framed panel with a woven core.
In Romanian, the related tradition is the casă de paiantă: a timber-framed house whose panels are filled with woven twigs daubed with clay, with split lath and clay, or with adobe blocks. The Romanian term is broad. Not every paiantă is wattle, and not every wattle wall is Romanian. The technique belongs to a wide European and global family; what follows is a practical method, with the Romanian vocabulary and variations noted where they matter.
How the wall behaves
Wattle and daub is vapour-open, repairable and low in embodied energy. The clay absorbs and releases moisture, which helps to buffer humidity in a dry, well-ventilated building. The wall has useful thermal mass but poor insulation: a 10 cm daub panel is not a cold-climate wall. In a cold place, plan to add insulation on the outside or use a different wall system.
The wattle gives the daub something to hold on to. As the clay dries and shrinks, it grips the sticks instead of pulling away from a flat surface. The frame carries the roof and wind loads; the panels stiffen it somewhat, but you should not rely on the daub for structural strength. Brace the frame properly and design the panels as infill.
The enemies are water, movement and incompatible repairs. A raised plinth, a generous roof overhang, clear gutters and a breathable finish matter more than the exact daub recipe. A cement render over a clay panel traps moisture and is one of the most common ways these walls are ruined.
Materials and tools
Frame and wattle
- Rot-resistant timber for posts, plates and studs
- Hazel, willow, alder or ash rods, 1.5–3 cm thick
- Wooden pegs or corrosion-resistant nails
- Bracing and noggins
Daub and plaster
- Clay-rich subsoil, screened
- Sharp sand
- Chopped straw or chaff
- Clean water
- Well-rotted horse manure (optional)
- Lime putty or lime render for exposed finishes
Tools
- Axes, billhook, saw and auger
- Hammer, level and measuring line
- Buckets, mixing tarp and hoe
- Plastering trowel and float
- Gloves, goggles and a respirator for dust
Do not use cement in the daub or the finish. Cement makes the skin harder and less breathable than the clay beneath it; the panel then traps moisture behind a rigid crust. Use clay, lime or a lime-clay hybrid, and keep the wall able to dry.
Frame and foundations
Build the frame first, and build it as if the panels were not there. Posts, a sole plate, a top plate, studs at 40–60 cm centres, noggins between studs and diagonal braces at the corners make a stiff box. The frame carries the roof; the infill only fills the bays. Use a ring beam or a properly tied wall plate, and design openings with trimmer studs so the wattle has a firm edge to weave against.
Keep the timber frame above the wet. A stone or rubble plinth at least 30–45 cm above outside ground, a damp-proof layer of slate or stone, and a sole plate that can dry are essential. Do not bury the frame in soil or set it directly on a wet slab. The bottom of a wattle panel is the first place to rot, and the first place to inspect every year.
Give the building a large roof overhang — at least 45–60 cm on the weather side, more where driving rain is common. Keep gutters and downpipes clear. A wattle wall that stays dry can last for generations; one that stays wet will fail from the bottom up.
Weave the wattle
Cut hazel, willow or alder rods in winter, when the sap is down and the wood is flexible. Use straight, clean rods about 1.5–3 cm thick; thicker rods are hard to bend, and very thin ones do not give enough key. Green rods weave easily. Dry rods can be soaked for a few days to make them pliable again.
There are two common ways to make a panel. Weave in situ: fix upright stakes at 30–45 cm centres inside the frame, then weave horizontal strands over and under them. Make a hurdle: weave a panel flat on a simple jig or on the ground, then lift it into the frame and fix it. In situ is easier for small panels; pre-made hurdles are easier to control and can be made under cover.
-
Prepare the rods
Remove side shoots and sharp stubs. Sort by thickness: thicker rods for stakes, thinner ones for strands. Cut the ends cleanly. Wear gloves; fresh hazel and willow can whip and scratch.
-
Set the stakes
Fix uprights to the frame at 30–45 cm centres. They should be firm but not split the frame. For a small repair panel, a stake at each side and one in the middle is enough; for a full wall bay, keep the spacing even so the weave does not sag.
-
Weave the strands
Start at the bottom. Pass a long, flexible rod over one stake and under the next, working across the panel. At the end, turn the rod and weave back, so the pattern alternates. Push the strands down firmly as you go. “Pairing” — two rods twisting around each stake in opposite directions — gives a tighter, more even weave for visible panels.
-
Keep an open key
Aim for a firm lattice with gaps of roughly 2–5 cm. Gaps that are too large let the daub fall through; a lattice that is too tight and smooth gives the clay nothing to grip. The daub should be able to pass around the rods and lock behind them.
-
Fix the edges
Weave the strands tight against the studs and trim them flush. Fix the wattle to the frame with wooden pegs or nails at the edges if it is loose. Any movement now will become a crack in the daub later.
-
Check the panel
Press on the weave: it should feel springy but firm, with no rattling. Repair loose stakes before daubing. A wattle panel that moves independently of the frame will shed its daub in the first season.
Door and window edges. Weave tight to the trimmer studs and seal the junction with a small fillet of daub. Do not leave a gap where wind-driven rain can enter. If the opening is wide, add an intermediate stud so the wattle does not span too far.
Mix the daub
A workable starting mix by volume is 1 part clay-rich subsoil : 2 parts sharp sand : 1 part chopped straw. If the subsoil is already sandy, reduce the sand. If it is very sticky and cracks as it dries, add sand and a little more straw. The straw should be clean and chopped to about 5–15 cm; long straw makes the mix hard to press into the weave.
Mix the dry soil and sand first, add water until the mixture is stiff but workable, and leave it to soak for a day. Then add the straw and tread or turn the heap until it is uniform. A handful squeezed in the hand should hold together without dripping. Test a small patch on a scrap of wattle and let it dry before committing a whole wall.
Horse manure, carefully
In parts of Romania, and in many other vernacular traditions, balegă de cal — horse manure — has been added to clay daub and plaster. It contributes fibre and organic matter, can make the mix more workable, and may reduce shrinkage cracking. It is not a waterproofing agent, a preservative or a substitute for straw, and it is not essential. A good daub works without it.
If you use it, use well-rotted manure from healthy animals, at roughly 5–10% of the daub volume, in the base coat only. Keep it out of the final finish coat and away from food-preparation surfaces. Wear gloves, cover cuts, and wash hands afterwards: manure can carry tetanus spores, gut bacteria and parasites. Avoid manure from animals recently treated with deworming drugs, because some residues persist in manure and soil. Compost fresh manure before use, and do not use it where children play or where it can contaminate a well or garden.
Fresh manure is sometimes used in traditional work, but it smells, attracts flies and carries a higher pathogen load. If you choose it, keep it in the rough base coat, let the wall dry thoroughly, and finish with a clean clay or lime plaster. The smell fades; the hygiene risk is managed by keeping it out of the finish and out of the kitchen.
Manure is also a marker of a living farm, not a magic ingredient. If you have no manure, use straw, chaff or fine plant fibre. If you have manure but no reliable supply of clean straw, the manure is not an adequate substitute for the fibre and structure that straw provides.
Apply the daub
-
Wet the wattle
Dampen the sticks with a brush or spray before applying the first coat. Dry sticks steal water from the clay and make the daub crumble at the contact points. Do not soak the frame; just dampen the weave.
-
Press the first coat
Take a stiff handful of daub and press it into the weave from one side, working it around the rods. Fill from the other side as well, so the clay locks through the lattice. Aim for a total thickness of 20–30 mm for the first coat. Work from the bottom up and from the middle out.
-
Key the surface
Scratch the surface with a stick or a comb while it is still soft. The key helps the second coat grip. Do not trowel it smooth yet; a smooth first coat is a poor base.
-
Cure slowly
Cover the panel with cloth, straw or a tarpaulin in hot sun or wind, and keep it damp for a few days. Slow drying reduces cracking. Do not light a fire near it or force it dry.
-
Add the second coat
When the first coat is firm but still slightly damp, press on a second coat 10–15 mm thick. Fill any shrinkage cracks and build out the panel to a fair surface. Cure again.
-
Finish
Apply a final clay or lime plaster 3–5 mm thick. A clay finish can be smoothed with a damp float and burnished when nearly dry; a lime finish is more weather-resistant but less forgiving. Keep the finish thin and breathable. Limewash can be applied once the wall is dry.
A finished wattle-and-daub wall is typically 8–15 cm thick, depending on the frame and the number of coats. It is not a high-performance insulated wall. Its virtues are low cost, local materials, good moisture buffering, repairability and a surface that feels warm and solid.
The Romanian paiantă tradition
Romanian ethnographic sources describe the casă de paiantă as a timber-framed house whose panels are filled or covered with woven twigs, split laths daubed with clay, or adobe blocks. The frame is usually oak or a locally available conifer; the infill depends on what the household had. In the plains and lower hills, where clay and coppiced wood were both close at hand, wattle and daub was one common solution.
The vocabulary is useful. Nuiele are the flexible twigs; împletitură is the weave; lut or argilă is the clay; lipitură is the daub or mud plaster; ceamur is a clay-straw mortar used for renders and sometimes for floors; and balegă de cal is horse manure. A household recipe might include clay, straw, chaff, sand and manure in proportions that were never written down and varied from village to village.
This is a living tradition, not a museum recipe. Some houses are timber-framed with wattle; others use split lath, adobe or fired brick between the timbers. Restorers should repair with compatible, breathable materials and should not strip a historically plastered wall back to the frame just because exposed timber looks picturesque. The National Museum of the Romanian Peasant and local conservation officers are better guides to a specific building than a generic mix.
If you are building new, treat the Romanian example as a design lineage rather than a building code. A modern timber frame can carry a wattle infill, but the frame, foundations, roof, insulation and fire detailing need to be designed for the site and the current rules.
Tests and troubleshooting
| Problem | Likely cause | Fix |
|---|---|---|
| Daub cracks badly | Too much clay or water; fast drying; straw too long | Add sand and chopped straw; shade and damp-cure; apply in thinner coats |
| Daub falls off the wattle | Lattice too tight or smooth; sticks too dry; coat too thick | Roughen or open the weave; wet the sticks; press the first coat through from both sides |
| Sticks rot at the base | Rising damp, splash, buried frame, blocked gutter | Raise the plinth, repair the roof and drainage, replace the rotten panel |
| Wall stays damp | Cement render, roof leak, internal moisture | Remove incompatible render, find the leak, ventilate and allow the wall to dry |
| Finish dusts or chalks | Clay-rich finish without protection | Use a leaner clay finish, burnish it, or apply a limewash or lime plaster |
| Manure smell or flies | Fresh manure, too much, or a damp wall | Use rotted manure in the base coat only; dry the wall; finish with clean plaster |
| Cracks at the frame | Rigid mortar at a moving joint | Use a flexible daub or lime fillet; allow the frame to move; repair annually |
| Panel feels cold | Low insulation value | Add external insulation and a rain screen, or choose a different wall for cold climates |
Make a test panel about 60 × 60 cm on a spare frame. Daub it with the exact mix you plan to use, cure it for two weeks, and then wet it with a hose. Watch where the water enters, how the surface erodes and whether the daub separates from the wattle. A test panel is cheap; a failed wall is not.
Limits and building rules
Wattle and daub is an infill, not a structural wall. Do not remove the frame, do not hang heavy loads from the daub, and do not use it as a retaining wall or a foundation. In earthquake zones, the frame needs proper bracing, connections and often sheathing or reinforcement designed by an engineer; traditional wattle panels are flexible, but the heavy roof and masonry plinth can still fail.
The wall has low thermal insulation, limited fire resistance (the timber frame and roof are combustible, even if the daub is not) and a real vulnerability to prolonged water. Check local building, fire and energy rules before using it for a dwelling. In many places a wattle-and-daub wall will need additional insulation, a rain screen or an accepted modern structural system around it.
For a first project, build a garden wall, a shed, a partition or a repair panel. Learn how your clay, your sticks and your climate behave before committing a house to them.
Safety
Manure and pathogens. Horse manure can carry tetanus spores, gut bacteria and parasites. Wear gloves, cover cuts, wash hands and tools, and keep manure away from food, wells and children’s play areas. Do not use manure from sick animals or animals recently treated with dewormers. Dust. Dry clay and sand contain crystalline silica; mix damp, wear a fitted respirator when sieving, and never dry-sweep. Tools. Axes, billhooks and saws cut deeply; keep a clear working zone and wear eye protection. Structure. A timber frame can collapse during erection or in wind; brace it, work in pairs and get engineering advice for anything you will live under. Lime. If you use lime for the finish, follow the lime safety rules: sealed goggles, gloves and no water into quicklime.
Sources and further reading
- Wikipedia: Wattle and daub — construction, history and regional variants.
- Wikipedia (Romanian): Casă de paiantă — the Romanian timber-framed tradition and its infill types.
- Wikipedia: Lath and plaster — a related but distinct thin-coat technique.
- Wikipedia: Daub — clay mixtures and their use in vernacular building.
- National Museum of the Romanian Peasant — Romanian vernacular architecture and rural life.