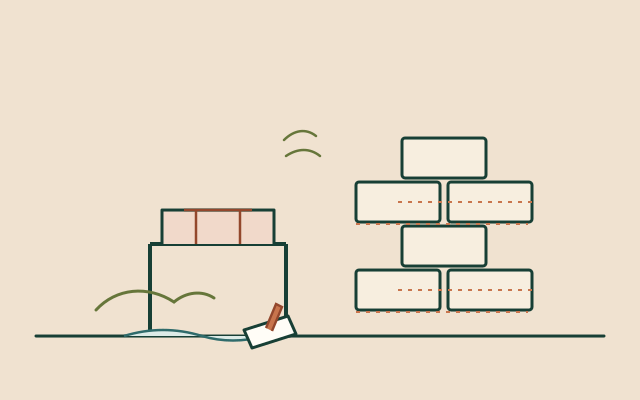
Earth is the cheapest building material on most sites and the easiest to ruin. The difference between a wall that stands for a century and a heap that slumps in the first rain is not a secret ingredient. It is soil selection, a little straw, thorough drying, and a building that sheds water instead of absorbing it.
Why earth, and what it is not
Adobe is air-dried brick made from subsoil, sand, water and fibre. It is heavy, good at storing heat, breathable, repairable and almost free at the point of use. It is also weak in tension, vulnerable to prolonged water and frost, and not a sensible material for tall, thin or unsupported walls.
Three related techniques are often confused. Adobe is moulded in a frame and dried. Cob is a wet, straw-rich mix stacked directly into a wall without bricks. Rammed earth is damp soil compacted between moving shutters. This guide covers adobe because it needs the least equipment and lets you test and reject bad units before they are in a wall. A fourth approach, wattle and daub, wraps a woven stick lattice in a clay-straw mix; it is the next recipe.
Earth walls work best in dry and temperate climates with a good roof and a raised foundation. In very wet or freezing climates they can still work, but the detailing has to be much better: large overhangs, a waterproof plinth, a breathable lime render, and no ledge where water can sit.
Choose and test the soil
Use subsoil, the layer below the dark topsoil, not the topsoil itself. Topsoil is full of roots, seeds and organic matter that shrinks, rots and invites insects. Remove 20–30 cm of topsoil and stockpile it for the garden; dig the subsoil beneath.
Good adobe soil is a mixture of sand, silt and clay. Too much clay and the brick cracks as it shrinks; too much sand and it crumbles. Aim for a mix that feels gritty but holds together, and always test a batch before moulding hundreds.
Jar test
Fill a straight jar one-third with soil, add water and a pinch of salt, shake hard, then leave it. Sand settles in about a minute, silt in hours, clay in a day or more. Mark the layers to estimate their proportions.
Ribbon test
Moisten a handful to stiff putty and squeeze it through your fist. A ribbon that hangs 3–5 cm before breaking suggests useful clay. A long, glossy ribbon suggests too much clay for adobe without sand.
Ball test
Form a ball, let it dry in shade, then drop it from about one metre onto firm ground. A good earth ball dents and holds; one that shatters is too sandy, one that flattens is too clay-rich.
Shrinkage tile
Press a small pat of wet mix into a shallow dish and scratch a 10 cm line on it. Dry it fully. Shrinkage over about 8–10% means too much clay or water; add sand and straw, and retest.
Do not use contaminated soil. Avoid ground near fuel tanks, lead paint, mine spoil, heavily treated timber, or industrial waste. Earth walls are in constant contact with the people inside them.
The mix
There is no universal recipe because the soil is already a mix. A practical starting point by volume is 4 parts subsoil : 2 parts sharp sand : 1 part chopped straw. If the jar test shows a lot of clay, increase the sand. If the soil is already sandy, reduce it. The straw is not structural reinforcement in the engineering sense; it limits shrinkage cracking, speeds drying and gives the bricks some toughness.
Straw should be clean and dry, chopped to roughly 5–15 cm. Long straw makes the mix hard to compact into corners; dusty, mouldy straw should be avoided. Some traditions add cattle dung, which can improve workability and water resistance, but fresh manure introduces pathogens and seeds. If you use it, compost it first, use it in the outer mix only, and do not rely on it for waterproofing.
Materials
- Clay-rich subsoil
- Sharp sand or gritty aggregate
- Clean straw or similar fibre
- Clean water
- Optional: sieved wood ash, lime for stabilisation
Tools
- Spade, mattock and wheelbarrow
- Wooden mould, about 30 × 15 × 10 cm
- Water container and watering can
- Tamper or strong boots
- Straight edge and trowel
Site
- Level, well-drained drying ground
- Shade or a simple roof for curing
- Space to turn and stack bricks
- Cover for sudden rain
For a stronger, more water-resistant brick, add lime at roughly 5–10% of the dry volume, or use a lime-sand mix as the mortar. Lime-stabilised earth is not waterproof concrete; it is simply less vulnerable. Test it. Do not add cement unless you have it and know the local method: a little cement can help, but it makes the brick stiffer, less breathable, and can increase cracking if the mix is wrong.
Make the bricks
-
Prepare the ground
Clear a level drying area and cover it with a thin layer of sand or straw so wet bricks do not stick. Bricks need to be turned and moved; keep the area close to the soil source without trampling the finished work.
-
Dig and break up the subsoil
Dig subsoil and break the clods while dry. Remove stones over about 20 mm, roots and any rubbish. A rough sieve helps, but perfect grading is not necessary for a first batch.
-
Mix dry
On a clean hard surface or in a shallow pit, combine subsoil and sand with a spade until the colour is even. Add the chopped straw and turn it through so it is distributed, not clumped.
-
Add water and soak
Add water gradually while turning. Aim for a stiff, workable mud that holds its shape when squeezed, not a slurry. Cover the heap and leave it to soak for 12–24 hours; this “souring” makes the clay easier to work and the mix more uniform.
-
Tread the mix
Bare feet, boots or a clean animal can tread the heap. Work from the outside inward and turn it again. The mix is ready when a handful compressed in the hand holds together, leaves a faint sheen, and does not drip.
-
Wet and sand the mould
Use a wooden frame without a bottom, with handles. Wet the inside, dust it with sand or fine dry soil, and set it on the wet ground or a board. A mould that sticks will tear every brick.
-
Fill and compact
Throw the mud into the mould in two or three lumps, pressing it into the corners with your fingers or a small rammer. Overfill slightly, then strike the top level with a straight edge. Work quickly; the brick should be firm enough to unmould immediately.
-
Unmould and repeat
Lift the frame straight up. If the brick slumps, the mix is too wet or too clay-rich; leave it to firm up and add sand or straw to the next batch. Space bricks so air can reach all sides and they do not touch.
-
Dry slowly
Leave the bricks in the mould shape for one to three days, then turn them on edge. Dry in shade and gentle air for one to three weeks, turning again. Rapid sun or wind dries the surface first and cracks the brick; cover with grass, cloth or a simple roof if conditions are harsh.
-
Stack and cure
When bricks are firm enough to handle without marking, stack them in a ventilated shed or under cover, with gaps between courses. Cure for another two to four weeks before building. A brick is ready when it is uniformly dry, rings when tapped, and does not crumble at the corners.
Build the wall
The wall is where most earth buildings fail, usually at the bottom. Water rises by capillary action, splashes up from the ground, or runs down and sits at the base. Raise the earth wall on a stone or rubble plinth at least 30–45 cm above outside ground level, with a damp-proof layer of slate, stone, or a lime-mortar bed. The plinth should project slightly so water drips clear.
Use a mortar of the same earth mix, or a weak lime mortar. Earth mortar is forgiving and repairable, but it is not waterproof. Lay bricks in a running bond, overlapping joints, and keep the wall thicker than you think: 30–45 cm for a single-storey load-bearing wall is a common range, with buttresses at long walls and around openings. Avoid long unsupported runs and heavy roofs bearing on a thin wall.
Openings need lintels: timber, stone or a reinforced ring beam. A continuous timber or reinforced ring beam at the top of the wall ties it together and spreads the roof load. This is not optional decoration; it is what stops a wall spreading under a roof.
Keep the roof big. In wet climates, aim for an overhang of at least 45–60 cm on the weather side, and more where driving rain is common. A deep veranda or a roof that comes down low protects the wall far better than any surface coating.
If the wall will be exposed, finish it with a breathable render. A mud plaster of sieved soil, sand and chopped straw is traditional and easy to repair; a lime render is more weather-resistant but less forgiving. Do not use cement render on an earth wall. It traps moisture behind a hard skin, and the wall spalls behind it. Keep the base of the render clear of the ground so it can dry.
Tests and troubleshooting
| Symptom | Likely cause | Fix |
|---|---|---|
| Brick slumps when unmoulded | Too much water, or too much clay | Let the heap stiffen; add sand and straw; compact harder |
| Cracks as it dries | Rapid drying, too much clay, too little fibre | Shade and cover; add sand; chop straw finer and mix evenly |
| Crumbles at the corners | Too sandy, or insufficient clay | Blend in a more clay-rich subsoil; avoid over-wetting |
| Surface dusts and erodes | No render, wrong soil, rain exposure | Repair with mud plaster; add a lime render; enlarge the roof overhang |
| Brick dissolves in water | Unstabilised earth, poor drainage, frost | Do not use in wet positions; raise the plinth; stabilise or use fired brick at the base |
Test a finished brick by soaking one in water for 24 hours and rubbing it: some softening is normal, but it should not turn to slurry. Break one open: the interior should be dry, uniform and free of a wet core. A brick that is still damp inside after weeks of drying will fail in a wall.
Limits and scaling
Earth walls are heavy: roughly 1,500–2,000 kg per cubic metre. A 30 cm wall weighs about 450–600 kg per square metre, so the foundation and plinth must be sized for it. Do not build a second storey, a long unsupported wall, or a wall carrying a heavy tile roof without engineering advice.
Earth performs poorly in earthquakes unless it is properly reinforced and tied; traditional adobe has killed people in seismic regions. If your site shakes, use a reinforced system designed for it, or choose another material. In frost climates, use frost-resistant footings and keep the earth well above the splash zone; freezing water in the wall breaks it from inside.
For a first project, build a garden wall, a shed, a bench or a small outbuilding. Learn how your soil behaves through a full wet season before committing a dwelling to it.
Safety
Dust. Dry clay and sand contain crystalline silica. Mix and sieve damp or wearing a fitted particulate respirator; do not dry-sweep. Structure. Earth walls can fail suddenly under a roof or during heavy rain; brace and buttress, and get local engineering advice. Soil contamination. Test or avoid soil from industrial, mining or waste sites. Lifting. A wet brick is heavy and awkward; use a cart and keep the work at waist height.
Sources and further reading
- Wikipedia: Adobe — history, composition and regional methods.
- Wikipedia: Earthen architecture — related techniques and conservation issues.
- Wikipedia: Rammed earth — why compaction differs from moulding.
- Appropedia: Earth construction — practical notes and links for small-scale builders.