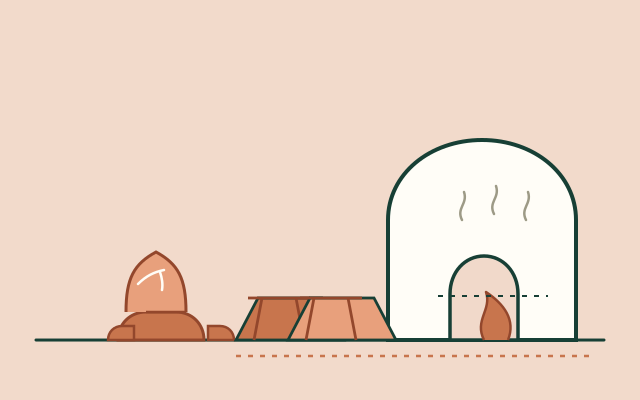
Fired clay is the first material that lets a settlement make something the ground cannot: a waterproof vessel, a roof tile that survives frost, a pipe that carries water. The craft is not complicated, but it is unforgiving of hurry. Clay must be wet enough to shape, dry enough not to crack, and hot enough to turn from mud into ceramic.
Find and prepare the clay
Clay is a fine-grained earth that becomes plastic when wet and hard when fired. It is usually found in river banks, cut banks, road cuttings, pond edges and beneath topsoil. A simple field test: moisten a sample, roll it into a sausage, bend it into a ring. A clay that holds the bend with few cracks is plastic; one that crumbles is too sandy or too short. Squeeze a wet ball through your fingers: smooth, sticky mud suggests high clay; gritty mud suggests sand or silt.
Dig the clay, break it into lumps and let it dry. Then cover it with water in a tub or shallow pit and leave it to slake for a day or more. The clay will fall apart into a slurry. Sieve the slurry through a coarse screen or woven basket to remove stones, roots and grit, then let it settle and pour off the clear water. Spread the resulting slip on a porous surface — plaster, unfired brick or cloth — until it stiffens to a workable putty. This is wedging and ageing; it makes the clay homogeneous and drives out air pockets.
Most local clays need temper. Add fine sand, crushed fired clay (grog) or both, at roughly 10–30% by volume. Temper reduces shrinkage, opens the body so it can dry without cracking, and gives the fired ware strength. Test a batch first: make a small tile, dry it, and measure shrinkage. Over about 10–12% linear shrinkage, add more temper.
Materials
- Local clay
- Fine sand or crushed fired clay
- Water
- Wood or charcoal for firing
- Optional: wood ash or slip for surface colour
Tools
- Spade, buckets and a settling tub
- Sieve or woven screen
- Wooden boards and a rolling pin
- Moulds for tiles and bricks
- Ribs, shells or smooth stones for shaping
Kiln
- Firebrick or dense clay bricks
- Clay-sand mortar
- A grate and a chimney
- Shelter from rain
Shaping: pots, tiles and pipes
Hand-building needs no wheel. For a pot, start with a flattened ball of clay for the base, then add coils of clay around the rim, joining each coil by pressing and smoothing it into the one below. Keep the wall an even thickness; thick lumps dry slowly and crack. Smooth the inside and outside with a rib, a shell or a wet hand. Let the pot stiffen to leather-hard before trimming the base and adding a rim or handles.
For roof tiles, roll or press clay into a wooden mould. A simple flat tile is a rectangle about 25–35 cm long, 15–25 cm wide and 1.5–2.5 cm thick, with a slight taper so tiles can overlap. A curved pantile is made over a rounded former or a log. Add a nib or a hole for fixing if your roof design needs one. Make a hundred identical tiles before you make one decorative one: roofs are judged by how they shed water, not by how they look from the ground.
For pipes, wrap a slab around a smooth former, join the seam, and slip the ends so lengths can socket together. Drain pipes can be square or circular; water pipes are harder because they must be well joined and fired evenly. A pipe that leaks defeats the purpose, so test lengths by filling them with water before installing.
A kick wheel or a simple hand-turned wheel can be built from timber and a heavy flywheel, but it is not necessary for tiles, bricks, plant pots or storage jars. Coil and slab work will teach you more about your clay than a wheel will.
Dry without cracking
Drying is where most beginner pottery dies. Water leaves the surface faster than it can migrate from the centre, so the outside shrinks and the inside does not. The result is a crack, a warp or a exploded pot in the kiln. Dry everything slowly, in shade, with gentle air, covered with a cloth or a loose board for the first few days. Turn tiles and pots so all sides dry evenly. In damp weather, bring work under cover or use a dry shed; in hot sun, cover it.
Thin tiles may be dry in a week; thick pots and bricks take two to four weeks. A piece is bone dry when it feels cool and dry to the cheek and its weight stops falling. If it feels cold or damp, it is not ready. Never fire a piece that is still damp: steam will crack it.
Fire the kiln
A simple updraft kiln is a chamber with a firebox at the bottom, a grate, a ware chamber above, and a chimney. Build it from dense bricks or clay-sand blocks, with a clay mortar. Insulate the walls; a thin wall loses heat and never reaches stoneware temperatures. Leave a stoke hole and a spy hole so you can see the colour of the fire without opening the whole kiln. A shelter with a roof keeps rain off and lets you fire in poor weather.
A pit firing is simpler: layer ware and fuel in a pit, cover with earth, and light it. It can reach 700–900 °C, enough to make earthenware, but the atmosphere and temperature are uneven and the results are fragile. It is a good first firing and a poor way to make roof tiles. A kiln firing at 950–1,050 °C gives terracotta its characteristic colour and enough strength for tiles, pots and pipes.
Fire slowly. Up to about 200 °C, drive off remaining water (“water smoking”); rushing this stage cracks ware. From 200–600 °C, organic matter burns out and quartz changes structure around 573 °C. From 900 °C upward, the clay sinters and becomes ceramic. Hold the top temperature for a short soak, then cool slowly. A fast cool can craze glazes and crack thick pieces. Expect the whole firing to take 8–24 hours, plus a day to cool.
| Stage | Temperature | What happens |
|---|---|---|
| Water smoking | 20–200 °C | Free water leaves; slow, steady heat avoids steam cracks |
| Burn-out | 200–600 °C | Organic matter and carbon oxidise; smoke clears |
| Quartz inversion | ≈573 °C | Quartz expands; uneven heat can crack thick ware |
| Sintering | 900–1,050 °C | Clay particles fuse; terracotta colour develops |
| Cooling | Slowly to ambient | Do not open the kiln hot; thermal shock breaks ware |
Glaze, food safety and colour
Terracotta is porous when unglazed. That is fine for plant pots, roof tiles, storage of dry goods and some building uses, but it is not ideal for wet food. A lead glaze is traditional and extremely dangerous: lead is toxic, especially to children, and it can leach into food. Do not use lead glazes, and do not buy unknown glazed ware for cooking.
If you want a food-safe glaze, use a tested lead-free recipe or a simple wood-ash glaze made from sieved wood ash, clay and feldspar (where available), fired to maturity. Test it on a small piece and have it checked if you intend to sell or cook with it. A safer route for a first workshop is to make unglazed ware for dry storage and plants, and to use glass, metal or bought ceramic for wet food until you can control glaze chemistry.
Colour can come from the clay itself — iron gives red, buff or brown — or from slips and engobes (liquid clay) applied before firing. Wood ash, salt and reduced atmospheres produce unpredictable but often beautiful surfaces. Keep decorative and food-contact work separate until you know the chemistry.
Tests and troubleshooting
| Problem | Likely cause | Fix |
|---|---|---|
| Cracks while drying | Too much clay, too much water, fast drying | Add temper, dry in shade, cover with cloth, turn regularly |
| Pot explodes in the kiln | Trapped water or air; firing too fast | Dry longer, wedge thoroughly, extend the water-smoking stage |
| Tile warps | Uneven thickness or uneven drying | Press to a consistent thickness; dry between flat boards, weighted |
| Soft, crumbly fired ware | Firing too cool; too much sand; short clay | Fire higher and hold longer; adjust temper; test a bar |
| White scum on the surface | Soluble salts in clay or water | Use cleaner water; soak clay; not usually structural |
| Glaze crazes or peels | Glaze and body expand differently; misfire | Adjust glaze, fire higher, cool more slowly; test tiles |
A fired test bar is your best quality control. Make bars of each clay batch, fire them with the load, then break and soak them. A good earthenware bar is hard, does not crumble in water and shows a uniform colour through the break. If it still has a dark core, the firing was too short or too cool.
Limits
Earthenware is porous, relatively weak and vulnerable to thermal shock. It is not the right material for a cooking pot over a hot fire unless it is made from a suitable fireclay body and fired well; a simple terracotta pot can crack when heated dry. Roof tiles need a sound structure, correct overlap and a pitch that sheds water; frost damage is a real risk in cold climates if the tile body absorbs water.
A simple kiln can reach earthenware temperatures but not reliably stoneware or porcelain. If you need vitrified ware, high-strength refractories or food-safe glazes, that is a different workshop with different fuel, kiln design and testing.
Safety
Silica dust. Dry clay, grog and ash contain crystalline silica. Mix wet, wear a fitted respirator when sieving, and never dry-sweep. Kiln. Carbon monoxide and flames: fire outdoors or in a well-ventilated kiln shed, never in a sealed room. Burns. Kilns, ware and ash stay hot for hours; use gloves and long tongs. Glaze. Avoid lead and unknown metal oxides; keep food-contact ware separate and tested.
Sources and further reading
- Wikipedia: Terracotta — material, firing and architectural use.
- Wikipedia: Earthenware — body types, porosity and glaze.
- Wikipedia: Pottery — forming, drying and firing methods.
- Wikipedia: Roof tiles — tile types, overlap and roof pitch.