
Crop 022 / Allium cepa

Match the day length, then dry the harvest well.

Grow onions for slender spring harvests or mature, papery storage bulbs. Start with sets for simplicity or seed for choice, select a cultivar whose bulbing response fits your latitude, and cure sound bulbs thoroughly before storage.

Choose the start
Sets or seed Sets are quick and convenient; seed costs less and opens a wider cultivar choice.
Typical crop window
80–150 days From direct sowing or planting sets to a usable bulb under favourable conditions.
Critical selection cue
Day-length response Short-, intermediate- and long-day cultivars initiate bulbs under different photoperiods.
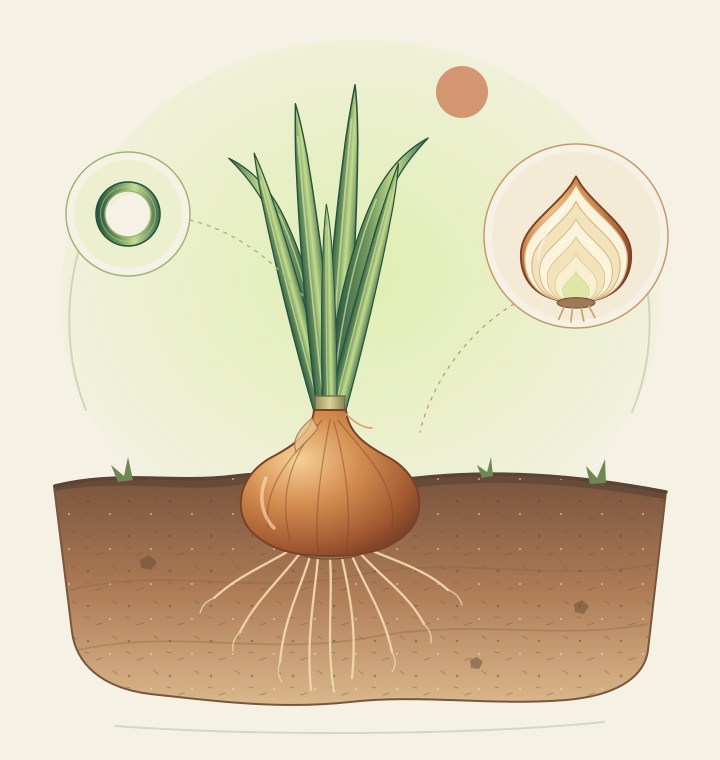
Onion plant with upright hollow green leaves, a copper-skinned bulb, fibrous roots and a sliced bulb showing concentric fleshy scales.
Hollow leaves feed the fleshy bulb scales below; a suitably timed cultivar builds foliage before day length triggers bulbing.

Know the crop

Crop profile

A biennial usually grown as an annual for bulbs or young shoots. Good establishment, enough leaves before bulbing and careful drying matter as much as the planting date.

Crop essentials

Botanical name
Allium cepa
Growth
80–150 days From direct sowing or planting sets to a usable bulb under favourable conditions. Spring onions are commonly pulled after about 40–70 days. Transplants need fewer days in the field but add their indoor raising time; large storage cultivars and cool soil take longer, while overwintering crops span the cold season.
Family
Amaryllidaceae
Origin
Central Asia, with a long history of cultivation across western Asia and the Mediterranean
Habit
Biennial usually grown as an annual for its bulb or immature spring-onion harvest

Nutrition / boiled and drained

Nutrition, in context

Moderate Editorial nutrient-density rank 2. This is Rooted’s qualitative category for protein, fibre, folate, iron and potassium in the site’s cooked-food comparison, with highlights adding context. It is not an official nutritional score or a universal ranking of vegetables.

Reference nutrients per 100 g onions, cooked, boiled, drained, without salt
NutrientAmount
Protein1.36 g
Fibre1.4 g
Folate15 µg
Iron0.26 mg
Potassium166 mg
  • Provides some fibre, folate and potassium, but is not a concentrated source of protein or iron in this cooked reference.
  • Raw bulb onion is a separate reference: per 100 g, USDA FDC 170000 lists 1.1 g protein, 1.7 g fibre, 19 µg folate, 0.21 mg iron and 146 mg potassium.
  • Neither mature-bulb reference describes spring onions, dehydrated onion, fried onions or recipes with added fat and salt.

Basis: Approximate values per 100 g onions, cooked, boiled, drained, without salt (USDA FoodData Central SR Legacy 170001). Raw and drained boiled values are not interchangeable: water loss or uptake and discarded cooking liquid change nutrients per 100 g. Cultivar, maturity, preparation and serving size affect intake; listed content does not measure absorption or individual dietary needs.

At the table

Build a varied meal around onions

  • Beans, chickpeas or lentils. Protein and fibre. Pulses add substantially more protein, fibre, folate and iron to an onion-based dish. Onion contributes aroma and texture rather than carrying the meal’s protein needs. Cook onions into a lentil and tomato stew, or add them to a chickpea and vegetable traybake.
  • Rice, barley or whole-grain bread. A varied meal. Grains make an onion and pulse dish more substantial and contribute their own nutrients. Choose the grain and protein foods that suit dietary preference and overall needs. Serve onion and bean stew with barley, or spoon lentil and onion filling into whole-grain flatbread.
  • Eggs, fish, yogurt or tofu. Protein variety. These accompaniments add protein and different nutrients alongside onions and other vegetables. No single accompaniment is essential. Try an onion and vegetable omelette, tofu with spring onions and greens, or fish with a cooked onion sauce.

The essentials

From the right cultivar to a dry, sound bulb

Six practical stages. Adapt the starting method, photoperiod class and protection to your latitude, season and locally identified pests.

  1. Match cultivar and starting method to place

    Choose short-, intermediate- or long-day cultivars with local advice; altitude does not change photoperiod. Sets are small dormant bulbs that establish quickly but offer fewer cultivars and can bolt, while seed is cheaper and more varied but needs timely sowing. Use only named overwintering cultivars for autumn planting.

  2. Prepare a sunny, drained bed

    Remove weeds and loosen compacted soil without working wet ground into clods. Onions have modest, shallow root systems and little foliage to shade competitors. Use mature organic matter where appropriate, avoid fresh manure and waterlogging, and choose raised beds or containers if drainage cannot be made reliable.

  3. Sow or plant on the local schedule

    Sow seed about 1–1.3 cm deep, indoors for an early transplant or outdoors when soil is warming; thin gradually. Plant sets with the pointed tip just at the surface and firm around them. A common final bulb spacing is 10–15 cm, but follow the cultivar. Closer planting or earlier pulling gives smaller bulbs or spring onions.

  4. Build leaves before bulbing

    Keep the crop weed-free and water evenly during establishment, leaf growth and early bulb swelling. Avoid deep hoeing near roots. Excess late nitrogen and irrigation can delay drying and impair storage, so follow local soil-test advice and reduce water as bulbs mature rather than forcing lush late growth.

  5. Scout and prevent allium pests

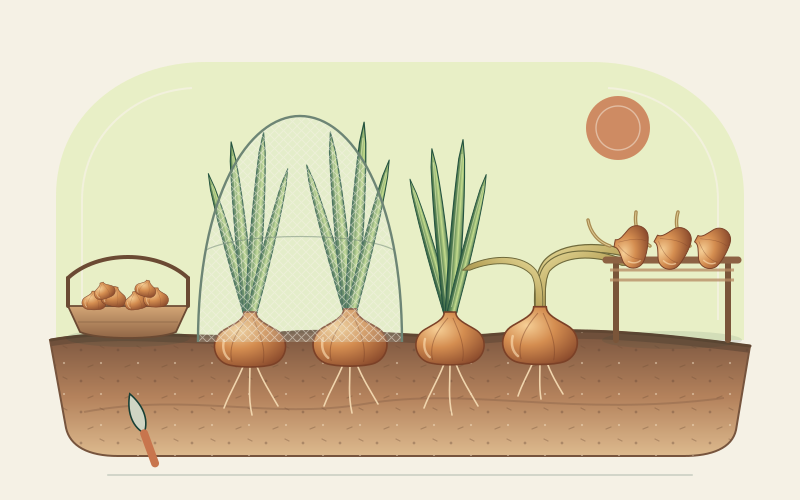
    Identify the problem before acting: onion maggot damages roots and bulbs, allium leaf miner tunnels in leaves and necks, and thrips cause silvery feeding marks. Rotate away from alliums, clear infested residue and secure insect-proof mesh where locally useful, ensuring pests cannot emerge beneath it. Follow regional advice for thrips and diseases.

  6. Harvest, cure and inspect for storage

    Pull spring onions young and chill them. For bulbs, wait for natural top yellowing and falling rather than folding green leaves. Lift gently when conditions suit, then dry with airflow until necks are tight and skins and remaining tops are papery, commonly about two weeks. Trim only after curing; store sound bulbs cool, dry and ventilated, and use damaged or bolted bulbs first.

Growing notes by place

Read your region, then read your weather

Compare broad growing conditions, then adjust for your latitude, altitude, rainfall, frost dates and locally trialled cultivars.

Cool, temperate and often maritime, with milder western coasts and colder inland, northern and upland sites.

Northwestern Europe

Long-day cultivars suit the summer photoperiod in Britain, Ireland and nearby districts. Spring planting is usual; only named overwintering cultivars should be used for autumn planting.

Indicative planting
Sow long-day seed indoors from February–March or outdoors when soil is workable in early to mid-spring; plant sets in March–April. Plant named overwintering sets in autumn only where drainage is reliable.
Indicative harvest
Pull spring onions while young. Lift spring-planted bulbs from July–October when tops yellow and fall naturally; autumn-planted cultivars often mature in June–July. Cure promptly under cover if weather is wet.
Soil and moisture
Fertile, sunny and free-draining soil with even moisture during leaf and early bulb growth; avoid fresh manure, compaction and waterlogging.

Field note: Choose heat-treated sets to reduce bolting risk, keep the shallow-rooted crop weed-free, and use insect-proof mesh plus rotation where allium leaf miner or onion fly occurs.
Dates are indicative. Local frost forecasts, heat, seasonal rainfall, latitude and recent weather—not the calendar alone—should guide planting and harvest.

Cool-temperate Northern Hemisphere · example

A bulb-onion rhythm

A compact planning guide for a long-day spring crop, not a fixed schedule. Shift it with latitude, cultivar and local conditions.

  1. February–March

    Start long-day seed indoors where the field season is short, or prepare a sunny, drained bed. Plant sets as soil becomes workable; do not plant an ordinary spring cultivar in autumn as a substitute for an overwintering type.

  2. April–May

    Harden off and transplant sturdy seedlings, thin direct-sown rows and establish even moisture. Hand-weed close to plants and secure appropriate mesh where local allium pests require it.

  3. June–July

    Pull some young plants as spring onions, leaving final bulb spacing. Maintain water through leaf growth and early swelling, inspect for thrips and mining damage, and remove flower stalks from bolted plants for early use.

  4. August–October

    Let mature tops yellow and fall naturally. Lift bulbs without bruising, cure with shelter and airflow until necks and skins are dry, then trim and store only sound bulbs in ventilated trays or nets.

The general 80–150-day window runs from direct sowing or planting sets to a usable bulb under favourable conditions. Spring onions are commonly pulled after about 40–70 days. Transplants need fewer days in the field but add their indoor raising time; large storage cultivars and cool soil take longer, while overwintering crops span the cold season.

From the field journal

Grow, choose and cook your onions

Practical reading for a well-adapted row, informed variety choices and ordinary meals without superfood claims.

Your next harvest begins here

Start with the right day length, not just a familiar name.

A short row is enough to compare a locally recommended cultivar from sets and seed. Keep notes from planting to natural top fall, then learn how fully dry necks and skins carry the harvest into storage.

Open the growing guide