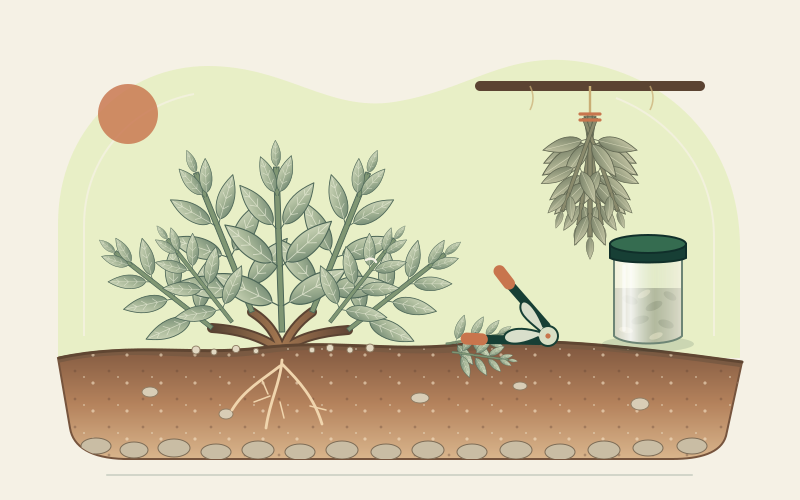
Know the plant and the first harvest
Common or garden sage, Salvia officinalis, is a short-lived, semi-woody perennial in the mint family. Its opposite, simple leaves are aromatic, softly hairy and usually grey-green; young square stems become woody with age. Violet-blue, two-lipped flowers appear in whorls on upright spikes and attract bees. This botanical identity matters because pineapple sage, clary sage and Russian sage are different plants, not alternative cultivars of culinary common sage.
The first harvest depends on the starting material. A rooted nursery plant growing strongly may allow a few leaves after roughly 75 days of establishment. Seed-raised sage is slower: the RHS advises allowing at least a year to reach harvesting size. These are indicative windows, not a command to pick on day 75. Cool weather, a small root system, waterlogging or recent transplanting justify waiting longer.
Sage is not finished after that first picking. It can remain productive for several years, although older plants often develop bare centres and sprawling woody stems. Harvest as a recurring removal of modest quantities of young growth, while keeping enough leaf area to sustain the perennial. Propagate replacements before an old plant deteriorates rather than expecting a severe renovation cut to restore it.
Build the site around drainage
Choose full sun and a place where water never stands around the roots. Common sage tolerates modest fertility and, once established, dry conditions, but “drought tolerant” does not mean that a new transplant needs no water. Nor does it mean that heavy, wet winter soil is acceptable. Persistent saturation encourages root problems and can kill a plant that would otherwise tolerate local cold.
On clay or compacted ground, use a raised bed or container rather than adding a small pocket of grit beneath the root ball and creating a sump. The RHS suggests a container at least 30 cm wide and deep, with ample drainage holes and a peat-free potting mix containing up to 25 per cent horticultural grit by volume. Do not block the holes with a saucer of standing water.
Allow roughly 45–60 cm between typical plants, adjusting to the cultivar label and mature spread. Open spacing improves airflow and makes inspection easier. Avoid excessive nitrogen, fresh manure against the crown and a damp mulch piled around the stems. A thin mineral mulch may suit a wet climate, but no surface treatment can compensate for a waterlogged root zone.
Plant and care, step by step
Choose the propagation route
For the quickest harvest, begin with a healthy young culinary-sage plant. For common green sage, sow seed indoors in spring in moist, drained seed mix and cover thinly; grow seedlings in bright conditions and pot them on without crowding. Named cultivars such as ‘Berggarten’, ‘Icterina’, ‘Purpurascens’ and ‘Tricolor’ are generally propagated vegetatively so their foliage traits remain true.
Root softwood cuttings or layer a stem
Take non-flowering softwood cuttings in late spring or early summer, using clean tools and a moist but free-draining propagation mix. Alternatively, peg a low, flexible stem into soil while it remains attached to the parent, keeping the tip exposed; separate it only after a sound root system has formed. Do not transfer unknown pests or diseases with old plant material.
Harden off and plant at the right depth
Acclimatise indoor-raised plants gradually to outdoor sun, wind and temperature. Plant after locally damaging frost in cold districts, or during a mild establishment window elsewhere. Set the top of the root system at its previous level, only lightly covered with soil. Firm gently, water once to settle the roots and leave room for the mature spread.
Water to establish, then respond to the site
Check moisture below the surface. Water young plants during dry spells through their first growing season, allowing excess to drain. Established plants in the ground may need no routine irrigation in suitable climates. Pots dry faster and require regular checks in summer, but their mix should not remain saturated. Reduce unnecessary water as growth slows; winter rain shelter can help container plants in wet regions.
Feed lightly and weed without smothering
Garden sage in suitable soil usually needs no feeding. A long-established container plant may benefit from a modest general-purpose feed in late spring or early summer, following the product label. More fertiliser is not a route to better flavour. Hand-weed around the plant, keep tools out of the root zone and avoid deep cultivation that damages the perennial.
Observe before treating a problem
Check leaf undersides, new shoots and the base regularly. Slugs, spider mites, leafhoppers, capsid bugs, powdery mildew, wilts and root rots occur in some settings; similar damage can have different causes. Correct saturation and crowding first, remove badly affected leaves where appropriate and obtain a local diagnosis before considering any control. Never improvise a pesticide dose on a culinary herb.
Prune for leafy shoots, not a stump
Lightly prune established plants in mid- to late spring, when new growth makes live and damaged tissue easier to distinguish. Shorten some leafy shoots to encourage branching and a compact outline. Routine light picking through the growing season supplements this work. Remove faded flower stems in late summer where you do not want seed or an extended floral display.
The key boundary is living leafy growth. RHS and NC State guidance both warn against hard pruning into mature bare wood, which may not reshoot. A tidy dome cut into brown, leafless stems can therefore be the end of useful growth rather than rejuvenation. In cold areas avoid a major late-autumn cut that stimulates soft growth or exposes the plant before winter.
When a plant has become too woody, take cuttings from a healthy replacement shoot and plan succession instead of relying on one severe cut. A lifespan of several years is normal; “perennial” does not mean immortal or permanently productive without renewal.
Harvest fresh leaves and dry a sound crop
| Harvest | When | How much and how |
|---|---|---|
| First year from a nursery plant | After strong establishment, often about 75 days | A few leaves or tips only; leave most growth |
| First year from seed | Usually not until at least a year of growth | Prioritise roots and framework over a harvest |
| Fresh use from established sage | As needed, with best young growth in spring and summer | Pick individual leaves or short shoots without clearing a branch |
| Main drying harvest | Dry weather, before flowering where practical | Cut modest bundles of sound young sprigs, retaining ample foliage |
Harvest after dew or rain has dried from the foliage. Use clean hands and tools, and leave dirty, insect-damaged, diseased or mouldy material out of the food harvest. Do not cut more than half of an established plant; a much lighter limit is appropriate for young or stressed sage. For fresh storage, refrigerate clean, sound leaves promptly in a vented container and use them soon. Wash under clean running water just before preparation, without soap or household disinfectant.
Prepare small, clean bundles
Inspect sprigs and remove damaged leaves. If washing is necessary, remove surface water thoroughly before drying. Tie loose, small bundles or spread sprigs in a shallow layer so air reaches all sides; thick bunches dry unevenly.
Dry dark, warm and ventilated
Hang bundles or use a clean drying screen in a warm, dark, well-ventilated, dust- and pest-protected place. In humid weather use a reliable covered drying method with good airflow rather than leaving sage in damp outdoor air. Direct sun and excessive heat can reduce quality.
Test for dryness before jarring
Leaves should be crisp and crumble readily; stems and leaf bases must not feel cool, soft or damp. Continue drying when in doubt. Strip leaves from tough stems only after they are fully dry, and keep them whole for better aroma retention if desired.
Pack, label and inspect
Use a clean, completely dry airtight jar. Label with contents and date, then inspect for condensation over the next few days. Return any questionable batch to drying only if there is no mould or spoilage; discard mouldy material. Store sealed sage cool, dark and dry, reopening it briefly for use rather than leaving it exposed to kitchen steam.
For freezing, wash and dry fresh leaves, chop if desired, pack in small recipe portions and freeze promptly in clean containers or water-filled ice-cube trays before transferring the solid cubes to a freezer container. Never leave home-made herb-in-oil mixtures at room temperature. Refrigerate mixed cooked dishes promptly and treat them as perishable food.
Sources and further guidance
- Royal Horticultural Society: Sage planting, pruning, harvest and storage
- University of Wisconsin–Madison Extension: Sage growth, first harvest and propagation
- North Carolina State Extension: Common sage identity, drainage and pruning
- US Food and Drug Administration: Selecting and serving raw produce safely
- Utah State University Extension: Harvesting and preserving herbs